
Picture this: you buy your first unit at 26 inches and 250% density, wear it twice, and put it in a box. Nothing was wrong with the wig. Nobody had explained that length and density have to match, or that HD lace punishes hands with no practice.
Here is the short answer to how to choose a wig for beginners: answer four questions — install time, leave-out, budget, styling range — and your wig type picks itself. This guide walks you through the options so you can find a wig that suits your routine, your style, and your budget.
The 4 Questions That Decide Your First Wig
Four questions — install time, leave-out, budget, styling range — narrow every wig down to four beginner specs.
Question 1 — How Much Time Will You Spend on Install?
If you have under two minutes a morning, a headband wig or half wig is your answer — no lace, no adhesive, no learning curve.
Question 2 — Do You Want to Leave Any of Your Own Hair Out?
Leaving your own hair out gives the most believable part, but it also means daily tension on your edges.
Question 3 — What Is Your Total First-Month Budget?
- A $140 to $260 first month buys a no-lace unit;
- $210 to $340 buys the 7x5 closure;
- $240 to $420 buys the 13x4 frontal.
What wig should I buy? Budget the month, not the unit — accessories alone run $60–$120.
Question 4 — How Much Styling Versatility Do You Need?
If you only ever wear a middle part, a 5x5 or 7x5 closure is enough.
- Middle part: 5x5 or 7x5 closure
- Side part: 13x4 frontal
- Ponytail: 13x6 frontal
The Beginner Default Spec
| Spec and who it’s for | What to buy | Why it fits |
| A — no skill wanted | 2-in-1 Switch™ headband-to-half wig | Zipper plus removable band switch two shapes; combs and drawstring — no lace, no glue |
| B — some hair to blend | InvisiBlend™ V Part with minimal leave-out | Minimal leave-out, no adhesive, tension on a smaller patch |
| C — one unit to rewear — most of you | Bye-Bye Slip™ 7x5 glueless closure | Silicone strip plus drawstring stops shifting; 7x5 keeps a tinting miss small |
| D — full hairline, full styling | Pre-Everything™ 13x4 glueless frontal | Ear-to-ear 13x4, knots pre-bleached, lace pre-cut, hairline pre-plucked |
Spec D is an upgrade path, not the best first purchase — most people only need full ear-to-ear lace after their third or fourth install.
All four are UNice collections, and if you want one unit to rewear, spec C is your answer. Browse the beginner-friendly collection.
Human Hair vs. Synthetic: What Actually Changes
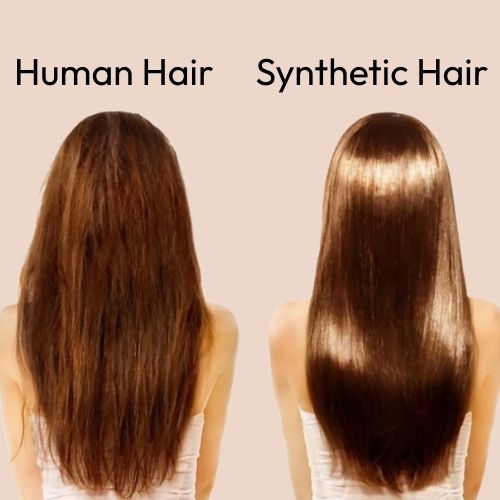
Human hair looks more natural, moves more freely, and lasts 12–24 months; synthetic costs about one-third as much and lasts 3–6 months. The key differences come down to four things: heat ceiling, lifespan, movement, and maintenance.
Which Is Better for a Beginner, Human Hair or Synthetic?
| Feature | Human Hair | Synthetic |
| Hairline realism | Natural on lace | Good, until it frizzes |
| Heat limit | ~350–400°F | Limited |
| Can be dyed | Yes | No |
| Weekly-wear lifespan | 12–24 months | 3–6 months |
| Maintenance | Higher | Lower |
| Best for | Committing | Testing |
The Real Trade-Off: Longevity vs. Cost
A synthetic wig may cost less upfront, but you'll usually need to replace it sooner than a human hair wig. If you wear wigs regularly, a human hair unit may offer better value over time.
Wig Construction, Ranked From Easiest to Hardest for Beginners
Ranked from easiest to hardest, the first wigs are headband, half wig, U or V part, glueless closure, then lace front with adhesive. Price doesn't follow this order. Time does.
| Level | Type and representative unit | Install and adhesive |
| 1 | Headband — 2-in-1 Switch™ (headband mode) | ~2 min; no glue |
| 2 | Half wig — same unit, band removed | ~5 min; no glue |
| 3 | U / V part — InvisiBlend™ V Part | ~10 min; no glue |
| 4 | 7x5 closure — Bye-Bye Slip™ 7x5 | ~15 min; glue optional |
| 5 | 13x4 frontal — Pre-Everything™ 13x4 | 25–40 min; glue optional |
| Level | Where it goes wrong | Ready when |
| 1 | Band too high | No skill wanted |
| 2 | Crown seam mismatches | You can cover the seam |
| 3 | Leave-out too tight | You’ll leave a section out |
| 4 | Drawstring unadjusted | Most stop here |
| 5 | Lace cut too short | 3–5 installs done |
Level 1 — Headband Wig
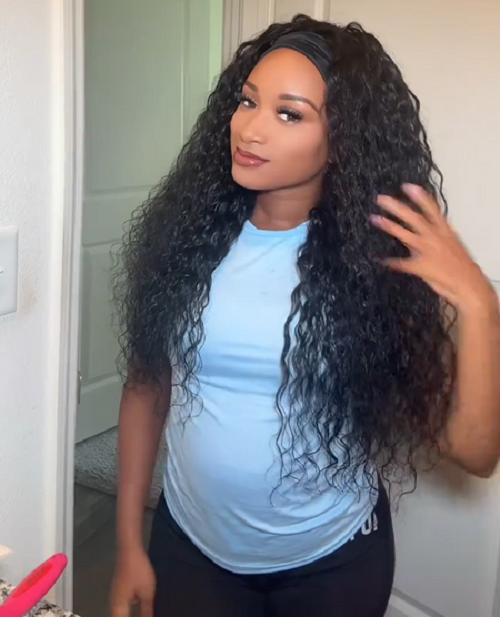
Image: Review from UNice
A headband wig installs in about two minutes, needs no lace work, and hides the hairline under a band.
It fails mainly when the band sits too tight or too straight — how to wear a headband wig covers placement.
Level 2 — Half Wig
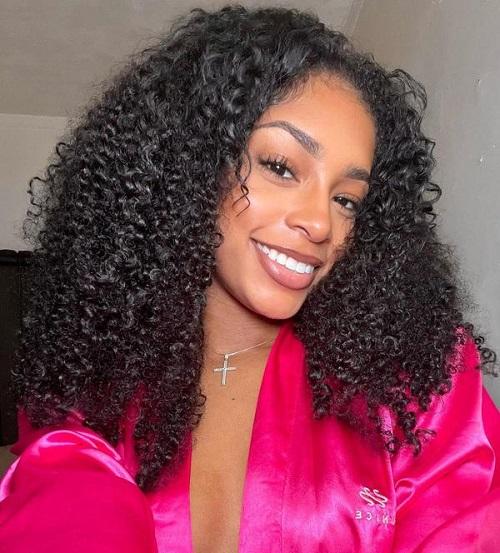
Image: Review from UNice
A half wig covers the back half of your head and blends at the crown, so your own hairline does the work.
Same unit, band removed, so one purchase buys two difficulty settings. Your own leave-out does the blending now, and the crown seam is the only place a half wig goes wrong.
Level 3 — U Part and V Part Wigs

Image: Review from @cristal_aido_
U part and V part wigs skip adhesive entirely — you leave a small section of your own hair out to form the part.
The risk is tension. The AAD documents traction alopecia as a preventable result of sustained pull, and Johns Hopkins estimates the rate at one in three African-American women — so soreness after two hours means loosen it. For more details, see our guide to V-part vs. U-part wigs.
Level 4 — Glueless Lace Closure Wig
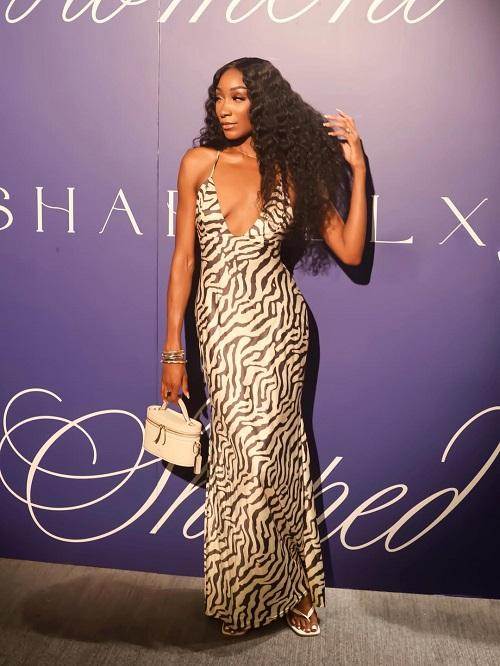
Image: Review from @indixo_
A glueless 5x5 or 7x5 closure is the sweet spot: real lace at the part, no adhesive, fifteen-minute install.
The drawstring decides this level. Tighten it with the unit on, then check the hairline in a mirror. No glue, no melting, and less room for beginner mistakes. For a secure, easy fit, try the Bye-Bye Slip™ 7x5 wig.
Level 5 — 13x4 and 13x6 Lace Front With Adhesive
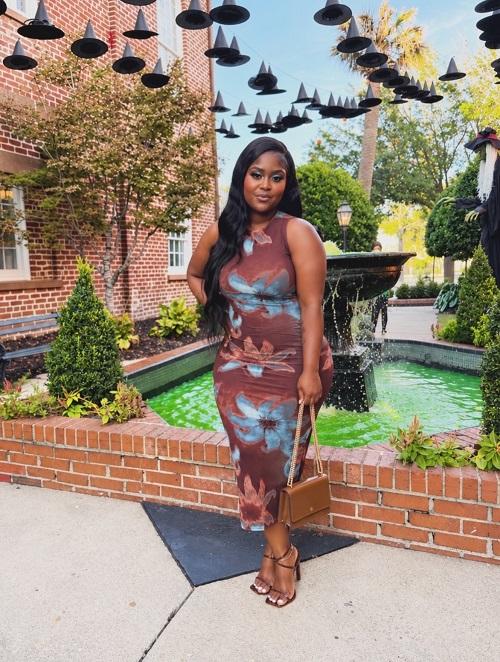
Image: Review from @abigail_simpson_
A 13x4 or 13x6 lace front offers a realistic hairline and more styling freedom, but takes practice to install.
Expect 25–40 minutes to cut, tint, glue, and melt the lace without lifting at the temples. Pre-cut lace saves time, but you still need to get the fit and finish right. For your first wig, start simpler and save this one for later.
What “Glueless” Actually Means (And What It Doesn’t)
Glueless describes how a wig stays on — straps, bands, and combs instead of adhesive — not how it looks at the hairline.
Glueless is an attachment method; lace front describes its hairline construction. A 13x4 lace front wig can be glueless, while a 5x5 closure wig may require glue. A wig can be both, so “glueless or lace front” is a false choice.
| Lace at hairline | No lace | |
| Adhesive | Glued lace front | Glued closure or 360 |
| Glueless | Glueless lace front — start here | Headband or half wig |
Lace Size and Lace Type: The Two Numbers That Matter
For a first wig, a 7x5 closure or 13x4 lace front is a practical starting point; 13x6 is worth it if you style updos.
Using a 13x4 lace front as an example, 13 inches is the lace width from ear to ear, and 4 inches is how far back it extends.
Bigger lace isn’t always better: more exposed scalp to blend, more tinting, and a wider surface where mistakes show.
13x4 vs. 13x6 vs. 7x5 vs. 5x5: What Can You Actually Do?
| Lace size (width × depth) | Scalp exposed | Parting range · pull-back and difficulty |
| 5x5 | Middle only | Middle, shallow side · no pull-back, easiest |
| 7x5 | Middle zone | Middle, moderate side · no pull-back, easy |
| 13x4 | Full front hairline | Any part · half-up, moderate |
| 13x6 | Full hairline, deeper | Any part, high updo · ponytail, hardest |
HD, Transparent, and Swiss Lace: Invisibility vs. Durability
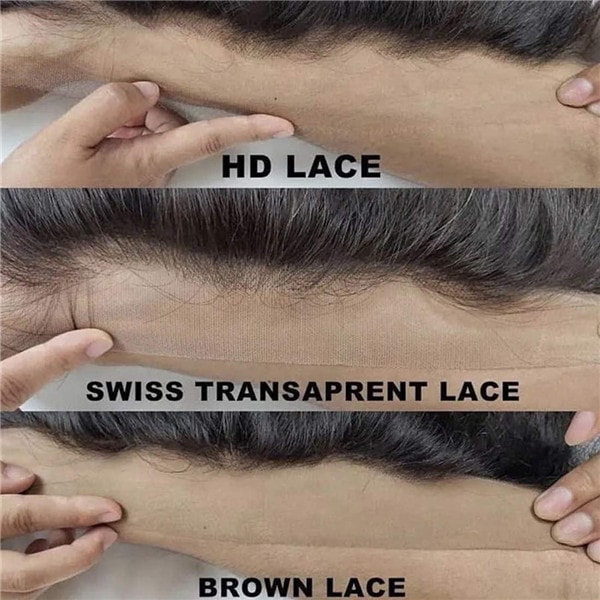
HD lace is ultra-thin and blends into many skin tones with minimal tinting, but it tears more easily during cutting.
Transparent lace is affordable and blends well with lighter skin tones, though deeper tones may need tinting.
Swiss lace is more durable and easier to handle.
Choose based on your skin tone, experience, and how often you handle your wig. You can learn more about the differences in HD Lace vs. Transparent Lace vs. Swiss Lace.
| Feature | HD Lace | Transparent Lace |
| Material | Ultra-thin, high-definition lace | Fine transparent lace, slightly thicker and more durable than HD |
| Blendability | Adapts to virtually all skin tones | Best match for light to medium tones; tint to a brown scalp shade for deeper tones |
| Visibility | Nearly invisible — the most undetectable hairline, even on camera | Seamless on light to medium tones; needs tinting to reach the same effect on deeper tones |
| Durability | Delicate; requires extra care during install and removal | Moderate and forgiving; the most reliable choice for everyday wear |
| Best For | Events, photos, and camera days — the invisible hairline | Everyday wear, repeat installs, and first-time buyers |
Wig Density: Why 150–180% Looks More Real Than 250%

150–180% density reads as natural hair; 200% and above is where a first wig starts looking like a wig.
Fuller isn’t always more natural. Real hair thins toward the ends, so density needs to match length. At 14 inches, 250% can look bulky; at 26 inches, it helps keep the ends from looking sparse.
For your first wig, start at 150–180%, or 130% if you prefer a finer look. Match density to your hair thickness and desired style, not just the percentage.
Length and Texture: The 16–18 Inch Safe Zone
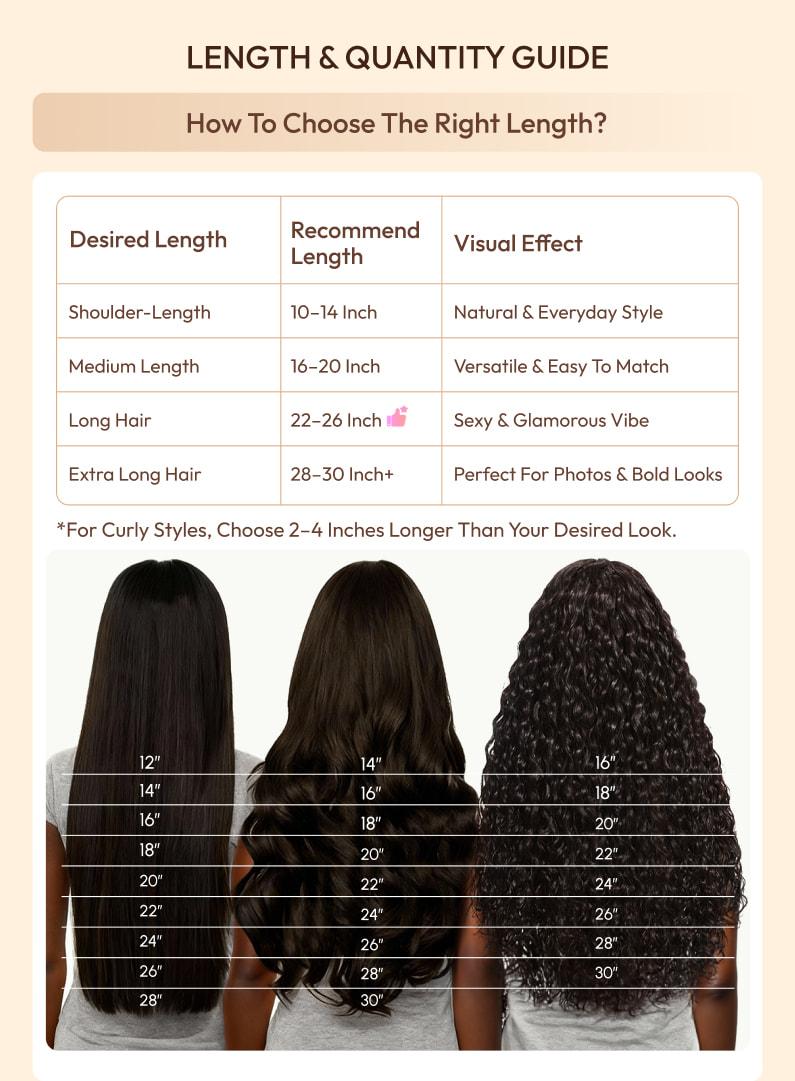
Image: Wig by UNice
Start between 16 and 18 inches in straight or body wave. It’s long enough to feel like a change without the detangling commitment of longer hair.
Texture matters, too. Straight and body wave need less maintenance; deep wave and tighter curls need more care and shrink more when worn.
Curly Shrinkage: Buy Longer Than You Want
Wig lengths are measured with the hair pulled straight, so curly units look shorter when worn naturally.
Straight loses little visible length. Deep wave can shrink 30–40%, while kinky curly can shrink 40–50%. Want curls that look 18 inches long? Consider 24–26 inches, depending on the curl pattern.
A 26-inch deep wave as your first unit is a detangling commitment, not just a hairstyle.
Cap Size and Fit

Image: Wig by UNice
Most first wigs come in an average cap size, but measure your head before you buy. Average is typically 22–22.5 inches around the hairline; petite runs 21–21.5, and large 23–23.5.
Three measurements matter: circumference, front hairline to nape, and ear to ear over the crown. Use a soft tape over your hair styled as you’ll wear it.
Between sizes, choose based on how you’ll wear your hair underneath and how the cap is secured. A loose cap can slip back; one that’s too tight can cause headaches.
Don’t guess. Here’s how to measure your head for a wig cap in three minutes.
Matching Lace and Color to Your Skin Tone
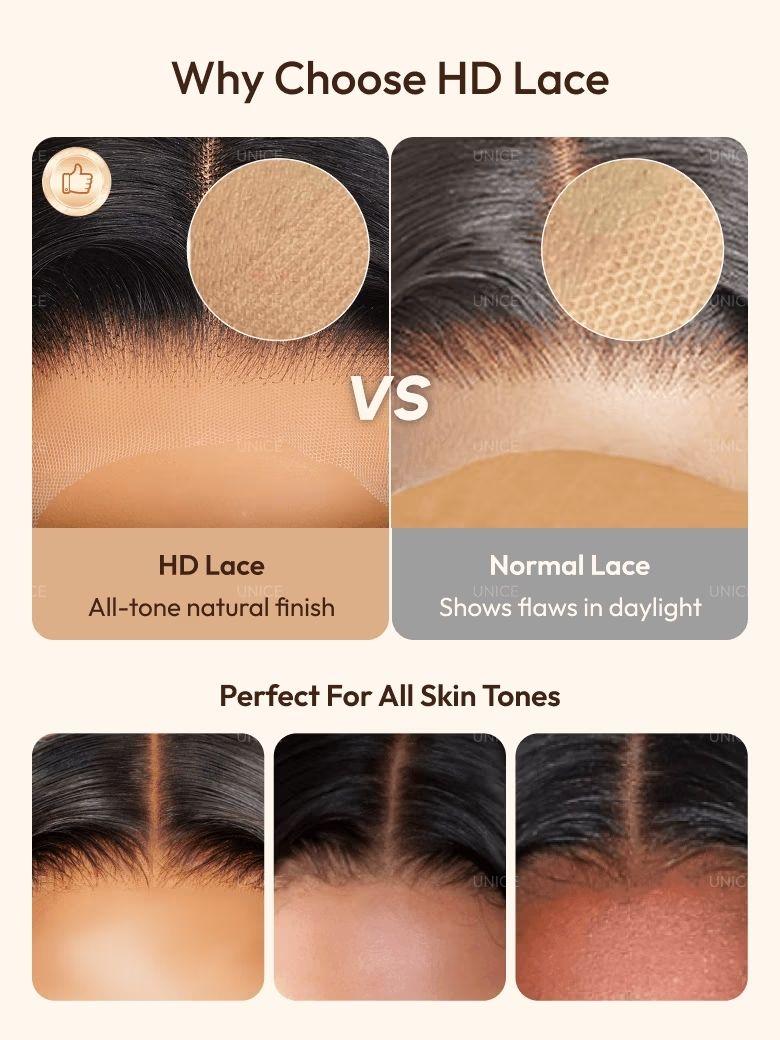
Image: Wig by UNice
Match lace to your scalp and part, not your foundation shade. On deeper skin tones, untinted transparent lace can look grey, while HD lace blends more subtly but tears more easily. Brown lace is another option if you want a shade that’s easier to tint.
Four things can give lace away: a shade that’s too light, no tinting, light hitting the part, and a part that looks too straight.
| Skin tone | Lace base and tint at the part | Knots and natural-reading color |
| Fair to light | Transparent; usually no tint | Bleached or hidden · most shades |
| Light to medium | Transparent; light tint at the part | Bleached · most shades |
| Tan to olive | Transparent or HD; tint the part | Pre-bleached · warm brown to black |
| Deep to rich | HD, tinted, or brown; yes, tint | Pre-bleached essential · black to deep brown |
Why Pre-Bleached Knots Matter

Image: Wig by UNice
Dark knots against light lace create tiny black dots along the hairline. Pre-bleached knots make them less noticeable without the risk of DIY bleaching, which can damage the knots and lace.
For an even more natural finish, look for features such as Melted HD or Real Scalp finishes.
What Your First Wig Really Costs
Budget $180–$300 list price for most popular units, but promos land at $99–$179; at 60 wears, that is about $3.33 per wear.
Unit Price Tiers and First-Month Totals
Under $150 may get you a basic unit with minimal lace or leave-out. Around $150–$220, you can find 7x5 glueless closure wigs; $180–$300 opens up more 13x4 lace front options.
Prices vary by length, density, and lace size. Promo prices on UNice listings have run as low as $99; series bands top out at $179, and they rotate — plan at the regular figure.
The Accessory Budget Nobody Mentions
Budget another $60–$120 in your first month for essentials like a wig cap, comb, leave-in conditioner, tint spray, bonnet, and stand. See how to wash a human hair wig before you buy—a wig-safe shampoo belongs on that list, too.
Cost Per Wear: The Only Number That Matters
Divide the wig price by how often you’ll wear it. A $200 wig worn 60 times costs $3.33 per wear before accessories; a $99 wig worn 40 times costs $2.48.
Wear that $200 wig weekly for a year, and the cost drops to $3.85 per wear. Wear it just three times, and each wear costs $66.67. Cheap and expensive are relative until you factor in how often you'll wear it.
If you'll only wear a wig a few times a year, consider whether human hair is worth the investment. Explore the beginner wig range by price and specs to find an option that fits your budget.
7 Beginner Mistakes That Make a Wig Look Like a Wig
Almost every fake-looking wig traces back to density that is too high, lace that is too light, or a cap that does not fit. If you're new to wigs, avoiding these common mistakes can make a big difference.
1. Too much density on too little length. Helmet silhouette. Fix: 150–180%.
2. Untinted lace at the part. Grey band along the hairline. Fix: tint to scalp.
3. A ruler-straight part. Reads as drawn. Fix: zigzag it.
4. A cap that doesn’t match your measurements. Rides up or aches. Fix: measure first.
5. Lace cut too short. A hard edge that won’t melt. Fix: cut in increments.
6. Wearing it before washing it. Stiffness and factory sheen. Fix: wash first.
7. Sleeping in it without a bonnet. Frizz at the nape. Fix: bonnet nightly.
5 Wigs Not to Buy as Your First Unit
Skip 250% density at 26–30 inches, full lace, DIY-bleached HD lace, $30 synthetics, and deep wave past 26 inches. They raise the difficulty, not the quality.
Not bad products — wrong firsts. Tippi Shorter, Mizani’s global artistic director, makes the same case to Byrdie: "You should learn installation techniques on a moderately priced one first." Spend the difference on unit two, when you know what you’re doing.
- 26–30 inches, 250% density: Weight, tangling, and proportions fight you at once. The burden outweighs the benefit for a first wig.
- Full lace or 360 lace: More lace means more prep and more room for mistakes.
- HD lace you bleach yourself: Over-bleaching can damage delicate knots and lace.
- $30 hard-lace synthetic: The lace gives it away; a poor hairline makes blending harder.
- Deep wave past 26 inches: Shrinkage hides the length, and detangling becomes a commitment.
Start with a unit you can install and maintain confidently. Save the more demanding styles for wig number two.
How to Choose a Wig Online Without Trying It On
Online, judge a wig by whether the listing states lace size, density, cap measurements, and how it stays on — vague listings hide thin lace.
Honest listings show video from multiple angles, print lace and density as numbers, and describe the attachment plainly. Dishonest ones show only retouched photos and never state a density.
Your First-Wig Shopping Checklist
Ten checks can separate a wig you’ll wear weekly from one that lives in the box. Start with lace size and density.
A beginner wig buying guide, condensed:
- Wig type chosen based on your installation needs and desired coverage.
- Lace size confirmed — 5x5, 7x5, 13x4, or 13x6.
- Lace type decided — HD, transparent, or Swiss.
- Length between 16 and 18 inches.
- Density between 150% and 180%.
- Cap size measured and matched to the size chart.
- Material confirmed — human hair or synthetic.
- Fastening method checked — glueless, adhesive, combs, or adjustable straps.
- First-month budget includes accessories and care products.
- Hairline prep, washing, storage, and return policy checked.
Frequently Asked Questions
Which wig type should most beginners start with?
For most people, the answer is a glueless 7x5 closure: 16–18 inches, 150–180% density, human hair. For zero technique, use a no-lace headband or a minimal-leave-out V part.
Should a beginner get a glueless wig or a lace front?
They aren’t opposites. Glueless covers how it stays on; lace front covers the hairline. A glueless lace front is both. Start glueless — it still uses silicone strips, combs, and drawstrings.
How much should I spend on my first wig?
Plan around the regular band of $180–$300, averaging near $200, with promos at $99–$179. Add $60–$120 for accessories, and always budget at the regular price, not the promo.
What density looks most natural?
150–180%, or 130% if your own hair is fine. Anything at 200% or above needs 24 inches or more to look proportional — density without length has no taper.
How do I know my cap size?
Measure circumference, front hairline to nape, and ear to ear. Most heads land in the average range. Straps and drawstrings give an inch of tolerance; a large cap beats a small one.
Can you sleep in a wig?
Not nightly. Friction roughens the cuticle and breaks down lace. If you must, wear a silk bonnet and loosen the straps. Sleeping in one nightly halves its lifespan.
How long does a human hair wig last?
Twelve to twenty-four months at two or three wears a week, washing every two to four weeks. Daily wear pulls that to six or twelve months. Lifespan tracks care, not price.
Why does my wig look fake?
Usually, the density is too high for the length, the lace is too light, or the cap doesn’t fit. Then details: a ruler-straight part, an overly tidy hairline, visible dark knots.
Do I need glue for my first wig?
No. Glueless units hold with silicone strips, combs, and drawstrings. Adhesive matters only for a fully exposed hairline or ponytail. On a first unit, the failure cost outweighs it.
Conclusion
Picking your first wig depends on your lifestyle, budget, and styling comfort. Key factors include cap fit, lace size, length, density, and maintenance. Headband wigs are easy to wear, while glueless wigs offer a natural part with minimal effort. You can explore more versatile styles later. Ultimately, the best first wig is comfortable, suits your routine, and makes you feel confident.