
How to Get Perfect Barrel Curls (Even If You're New to It)
Are you craving those soft, voluminous waves that look effortlessly chic? Barrel curls deliver a polished finish that works for everything from casual brunches to red‑carpet events. In this post, I’ll walk you through what barrel curls are, how I achieve them using both a classic barrel curling iron and today’s popular 3‑barrel styling tool, and how barrel curls differ from pin curls. Let’s dive in, step by step!
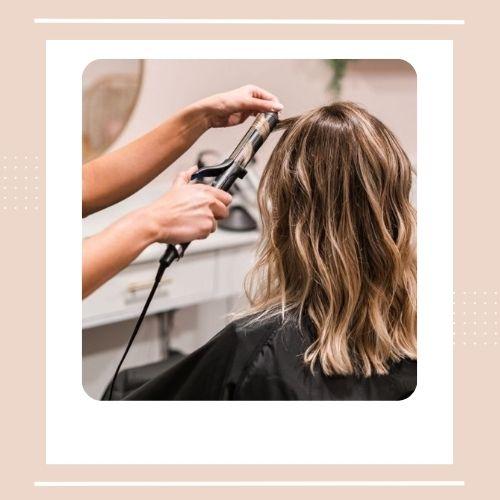
Source: Pinterest
What Are Barrel Curls
Barrel curls are large, smooth waves created by wrapping sections of hair around a wide‑barreled curling iron. Unlike tight curls or spiral curls, barrel curls have a relaxed shape that’s full of bounce. They frame your face softly, add shine, and stay in place without feeling stiff. Whether you’re styling shoulder‑length hair or a long mane, this technique gives you that chic glamour.
How Do You Do Barrel Curls
There are two main tools you can use: the classic single‑barrel curling iron and the trending 3‑barrel curling iron. I’ll guide you through both methods.
Using a Classic Barrel Curling Iron
If you’re new to barrel curls, the classic single‑barrel iron is a great place to start. It gives you control over the size and shape of each curl and works well on most hair types. I’ll walk you through how I use mine step by step—and if you’re more of a visual learner, there’s a video linked below that shows the whole process in action.
Step 1: Prep and Protect
I always begin by spritzing a lightweight heat protectant through damp hair, then blow‑dry until it’s completely smooth. This shields my strands from damage and helps each curl last longer.
Step 2: Section Your Hair
I usually divide my hair into top and bottom halves, clipping the top section out of the way. You can also split that top half into left and right sections for even more control. Working in 1‑inch slices ensures every curl looks uniform.
Step 3: Wrap and Hold
Starting with the bottom section, I wrap a strand around the barrel, holding it horizontally. I count to ten in my head—longer if my hair is very thick, shorter if it’s fine—to find the sweet spot between loose waves and defined barrel curls.
Step 4: Release and Cool
After letting the curl cool in my hand for a few seconds, I drop it onto a clip to set. Cooling this way locks in the shape. Once all the curls are clipped, I gently unclip each one.
Step 5: Finish and Fluff
At last, run fingers through the curls to break them up into waves, then mist a flexible‑hold hairspray to keep everything in place without crunchiness.
Using a 3 Barrel Curling Iron
The 3‑barrel curling iron is generally easier to handle than a single-barrel—though it still takes a bit of practice to get perfectly even waves. Here is the step-by-step guide.
Step 1: Heat and Preparation
Heat the triple barrels to a medium setting—usually around 300°F. Likewise, it’s best to mist on an anti‑frizz serum, concentrating on the mid‑lengths and ends.
Step 2: Clamp and Glide
Taking a 1‑inch section, I clamp the iron near the roots and glide it downwards in one smooth motion. Because the barrels are spaced evenly, the wave pattern forms naturally without having to wrap each strand.
Step 3: Break and Blend
Once my entire head is done, I shake out the waves with my fingertips, then brush lightly with a boar‑bristle brush for that old‑Hollywood sheen.
Step 4: Seal the Look
I finish with a shine mist and give my roots a quick blast of texturizing spray for lift.
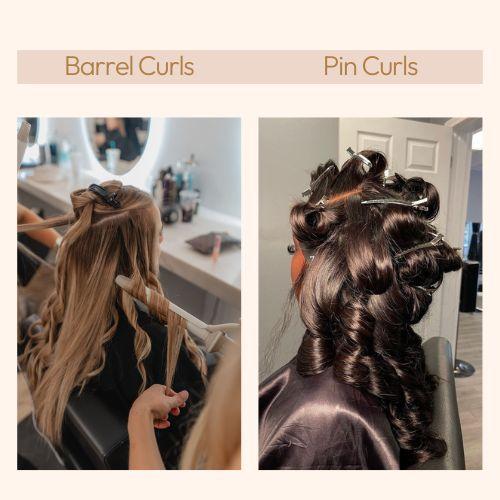
What Is the Difference Between Pin Curls and Barrel Curls
Pin curls and barrel curls are two classic curling techniques that create beautiful, lasting texture—but they work in very different ways. If you’re curious about how they compare, here’s a simple breakdown of what sets them apart.
✨Shape and Definition
Pin curls are tiny coils made by wrapping damp hair around your finger and securing it with pins. They give off that vintage, tight curl vibe—and once brushed out, they turn into soft, fluffy waves. Barrel curls, on the other hand, use a heated curling iron with a larger barrel to create big, bouncy waves in less time.
⌚Setting Time
Pin curls require patience—they usually take a few hours or an overnight setting to really hold. Barrel curls are much quicker to do since the heat sets the shape in minutes.
👀Versatility
If I’m going for a retro, long‑lasting curl, I usually go with pin curls. But when I want something faster and a little more laid‑back, barrel curls are my favorite—they’re great for everyday glam that still feels effortless.
Conclusion
Barrel curls are a timeless styling choice that gives you soft, romantic waves with minimal effort. Whether you prefer the precision of a classic barrel iron or the efficiency of a 3‑barrel tool, following clear prep, curling, and cooling steps will ensure your waves stay polished all day. Give these methods a try and let me know: which barrel curl technique wins your heart?


