
Spiral into Style: Your Complete Guide to Gorgeous Ringlet Curls
There's always quiet elegance in ringlet curls. These soft, cylindrical coils once framed royal portraits and now bring a touch of refined romance to modern life. In this guide, I'll walk you through simple, real-world techniques—both heat-based and heat-free—to help you recreate those gentle spirals. Get ready to welcome a hint of château charm into your daily style routine.
What Are Ringlet Curls?
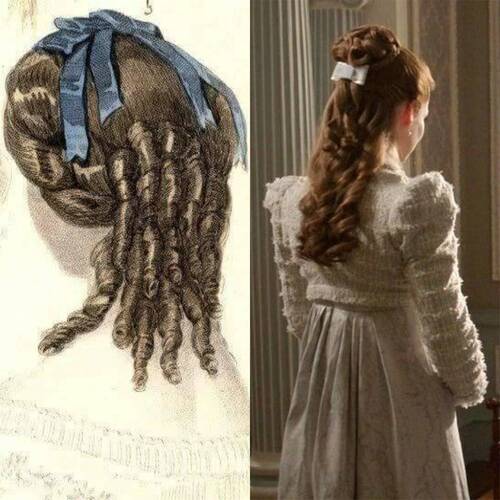
Ringlet curls are uniform, spring-like coils that hold a consistent spiral from root to tip—think of little corkscrews that add both volume and graceful structure. Unlike casual waves, they form distinct, cylindrical loops that bounce with every move. Once associated with vintage glamour and royal portraiture, ringlet curls have evolved into a go-to everyday hairstyle, effortlessly complementing everything from jeans-and-tee weekends to office-chic ensembles.
What Are Ringlets Called?
While “ringlets” is the most common name for these spiraling curls, they're also known as corkscrew curls or spiral curls. All these terms describe the same concept but can vary slightly depending on the texture, curl pattern, or cultural influence.
For instance, tight corkscrew curls are often linked with Type 3C or Type 4A hair textures, while looser spiral curls might be associated with Type 2C or 3A textures. Regardless of the terminology, ringlets are a universal style that anyone can achieve!
How to Get Ringlet Curls: Step-by-Step Guide
Achieving flawless ringlet curls is easier than it looks—you just need the right prep, tools, and a bit of patience. Below, I've broken down three methods—two heat-free and one heat-based—so you can pick what works best for you. I'll even share a few personal tips to help your spirals last longer and look more defined.
1. Heat Styling with a Curling Wand
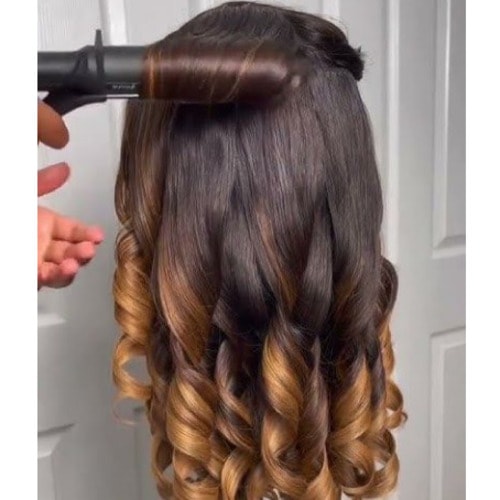
Source: Pinterest
1️⃣ Prep & Protect: I always start with clean, towel-dried hair. Spritz a lightweight heat protectant from roots to ends—this little step saved my strands from damage more times than I can count.
2️⃣ Section Strategically: Clip the top half of your hair out of the way and work in ½–to 1-inch sections. Smaller sections give you tighter, springier curls; larger ones feel more relaxed.
3️⃣ Wrap & Hold: Securing hair around clips creates those uniform ringlets I love. I hold each section for about 6–8 seconds—if your hair tends to resist, you can add a second or two.
4️⃣ Release & Shape: When everything's cooled, gently remove the pins. I like to use my fingers—never a brush—to separate the curls, then finish with a light-hold hairspray. A quick upward scrunch reminds the curls to spring back into shape.
2. Overnight Foam Rollers (Heat-Free)
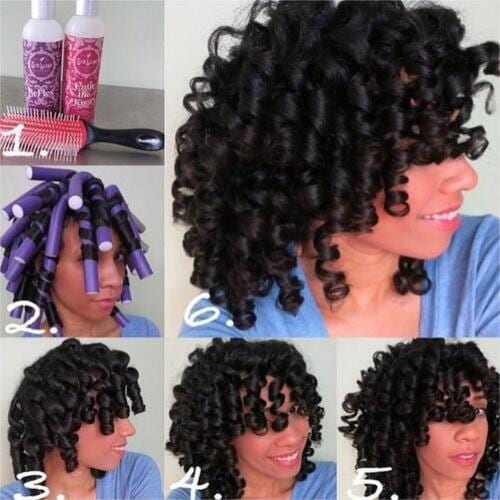
Source: Pinterest
1️⃣ Add Slip: On damp hair, I work through a dollop of curl-enhancing mousse. It gives the rollers something to grip, so my curls don't unravel overnight
2️⃣ Roll to the Roots: I section my hair into 1-inch strands and roll each from the ends up to the scalp, securing the foam roller snugly but comfortably.
3️⃣ Set While You Sleep: Sleeping on a satin pillowcase (or wrapping a silk scarf) cuts down on friction and preserves my coils.
4️⃣ Unroll & Define: In the morning, I carefully unroll each roller and let the curls drop. A tiny dab of lightweight oil over the ends adds shine without weighing them down.
3. Braids or Two-Strand Twists (Overnight)
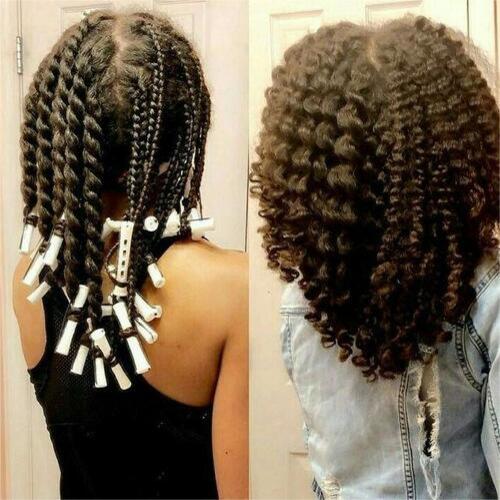
Source: Pinterest
1️⃣ Moisturize & Prep: I mist my hair with a leave-in conditioner or curl cream—this keeps strands hydrated and helps the pattern hold.
2️⃣ Divide & Conquer: Splitting hair into many small sections makes for tighter curls; fewer sections give you looser spring.
3️⃣ Braid or Twist
Braids: Three-strand braids create a looser, S-shaped wave once you unravel them.
Two-Strand Twists: These yield more uniform, corkscrew coils.
Curious about the differences? I found this helpful guide on braid-out vs. twist-out techniques: Braid Out vs Twist Out
4️⃣ Rest & Reveal: Sleep on the set braids or twists. When I wake up, I gently undo each section and shake out the pattern—no brushing!
5️⃣ Refresh & Lock: To finish, I smooth a dab of curl-defining gel under each curl and give a quick scrunch. This tames any frizz and keeps my ringlets looking fresh all day.
Feel free to pick and choose the method that suits your schedule and hair type. Personally, I mix it up depending on my morning routine—sometimes I'm all about the effortless overnight twist, and other times I'll spend a bit more time with my wand for that extra polished spiral. Either way, your perfect ringlets are just a twist, roll, or wrap away!
5 Must-Try Ringlet Curl Looks
Ringlets are the perfect canvas for countless looks. From ultra-natural to polished glam, they instantly upgrade your style game. Here are five head-turning ringlet curl variations to inspire your next hair adventure:
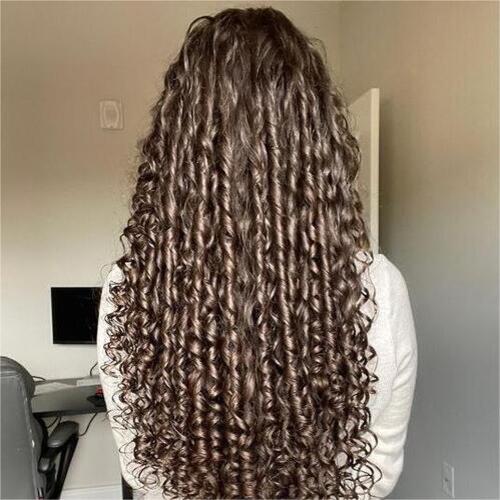
Natural Ringlet Curls
Source: Pinterest
Embrace your hair's innate texture by skipping any heat tools. After washing, apply a rich curl cream and scrunch to awaken your natural springs. Let your hair air-dry or diffuse gently on low heat for effortlessly chic coils that bounce with every turn.
Loose Ringlet Curls
Source: Pinterest
Opt for a relaxed spiral by wrapping slightly larger sections around your curling iron for just 5 seconds. The result drapes in gentle waves, offering a soft, romantic finish that's perfect for brunch dates or garden parties.
Tight Ringlet Curls
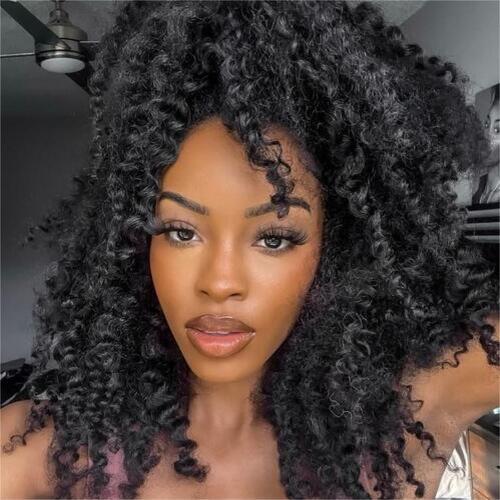
Source: Pinterest
For maximum pop, work with small sections on a smaller-barrel wand. Each curl stands out like a tiny spring, creating textured volume and playful energy. Pair with a deep side part to frame the face and let every coil shine.
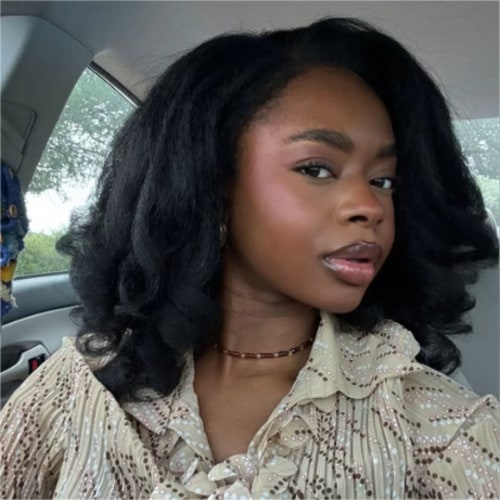
The stunning ringlet curls wig and natural-looking lace blend seamlessly for a flawless finish, while the twist-out ends add gorgeous texture and volume. Easy to install and style, it’s the perfect way to enjoy beautiful, bouncy curls without the fuss.
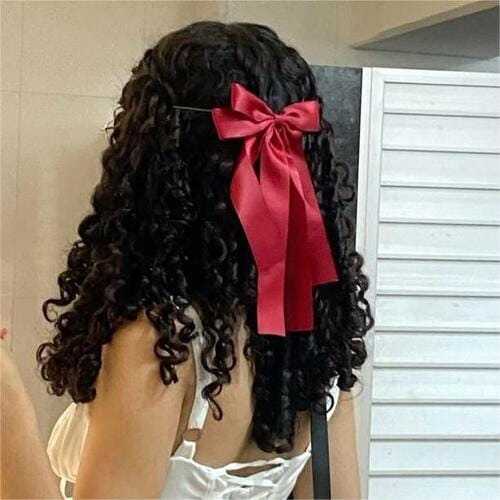
Long Hair Ringlet Curls
Source: Pinterest
On extended lengths, patience pays off. Section into micro-strands and wrap from midshaft to ends on a medium-barrel iron. These elongated spirals cascade in luxurious waves, perfect for formal events when paired with a jeweled hair clip or swept up one side.
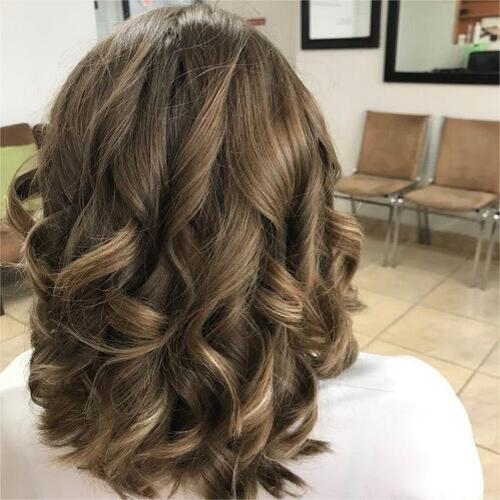
Blowout Ringlet Curls
Source: Pinterest
Start with a round-brush blowout to smooth roots and add lift, then switch to a medium curling iron on dry hair. Wrap each section loosely, alternating direction for a natural, wind-tousled effect. Once cooled, shake out the curls and finish with a sea-salt mist for that “I've just stepped off the plane” polish.
Maintaining Ringlet Curls: In My Own Words
I've learned that keeping ringlets happy is all about moisture and gentle care. Here's how I baby my curls between wash days:
Nightly Routine: I pile my hair into a loose pineapple on top of my head—this preserves coil shape and prevents flattening. A satin scrunchie does the trick without denting my strands.
Morning Refresh: If my curls look a bit flat, I spritz a mix of water and leave-in conditioner, then scrunch. The curls spring right back without needing any heat.
Weekly Deep Conditioning: Every Sunday, I slather on a hydrating mask with shea butter and let it sit for 20 minutes under a warm towel. My curls drink it up, staying soft and frizz-free all week.
Product Layering: I start with a light leave-in, follow with a curl-defining cream, then seal the ends with a tiny dab of anti-frizz serum. This combo locks in moisture and shine without any sticky buildup.
Conclusion
Ringlet curls are a celebration of texture, volume, and versatility. With the right prep, styling methods, and TLC, you can craft spirals that turn heads and boost your confidence. So grab your favorite tools—whether it's a curling wand, foam rollers, or a simple braid—and start experimenting. Your perfect ringlets are just a twist, wrap, or roll away!