How to Sew in a Hair Weave Like a Pro, Step by Step
Hair weaves have become a cornerstone of protective styling for Black women seeking versatility, length, and volume without compromising the health of their natural hair. By integrating high-quality extensions with your own hair, you can experiment with new textures, colors, and lengths while giving your strands a break from daily manipulation. Whether you’re transitioning between looks or simply want an effortless morning routine, a sew‑in weave offers long‑lasting wear and a natural-looking finish when done correctly.
Source: Pinterest
Tools and Materials You’ll Need
Before you get started, gather everything you’ll need to ensure a smooth installation:
- Hair Bundles
- Weave Needle and Thread
- Rat-Tail Comb
- Clips or Hair Ties
- Edge Control or Gel
- Hair Shears (Optional)
- Moisturizer or Light Oil (Optional)
How to Do a Sew‑In Weave Step by Step
Here you can learn detailed steps—feel free to watch the video below, but note that although it demonstrates using a hair net for extra hold, that’s entirely optional. The guide that follows will show you exactly how to get a flawless sew‑in weave.
1️⃣ Prepare Your Hair
First, I shampoo my hair with a sulfate‑free cleanser and deep conditioner to remove any buildup and restore moisture. Once rinsed, gently comb through with a wide‑tooth comb to remove all knots, then let your hair air‑dry or use a blow dryer on a low‑heat setting.
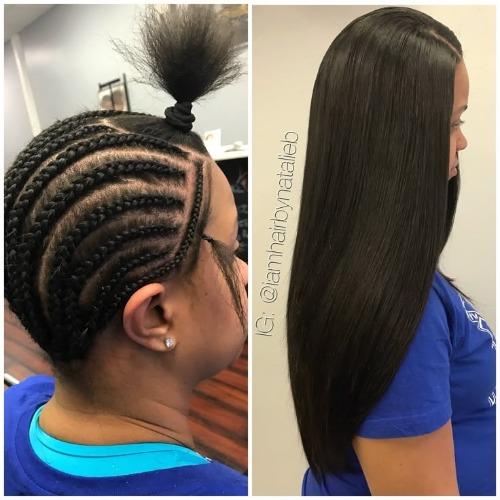
2️⃣ Create a Strong Foundation with Braids
Divide your hair into small, even sections and braid it into cornrows that follow the curve of your head. I prefer straight-back cornrows for maximum versatility, but you can customize the braid pattern as long as the braids lie flat. Aim for rows about ½ inch apart.
3️⃣ Start Sewing the Weft
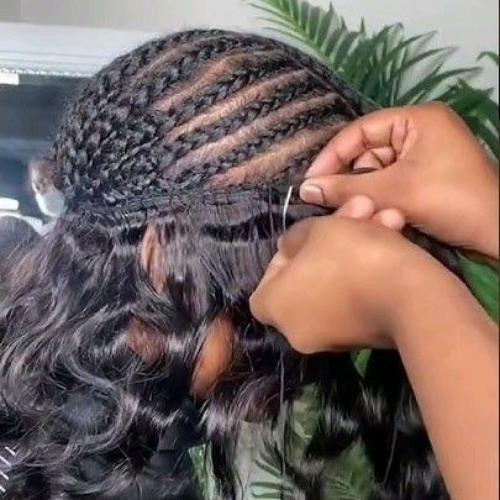
Source: Pinterest
Measure each row of braids to know where to cut your weft. Then thread your curved needle with polyester thread, knotting it at the end. Insert the needle under the first braid, pull through until the knot stops, and then sew over the weft. I typically do 3–4 stitches per inch of weft to keep it secure.
We, UNice hair, offer a range of popular hair weave products in various origins, curl patterns, and lengths, including the currently trending Burmese curly hair.
4️⃣ Layers for Fullness
After completing the bottom row, move up about ½ inch and sew the next weft. Repeat until you reach the crown, adjusting the row spacing to avoid an overly heavy top. I honestly find that alternating thicker and thinner rows gives my install a more natural density.
5️⃣ Install a Closure or Frontal (Optional)
If you’re using a lace closure or frontal, position it at the hairline, pin it down, and then sew around its perimeter, just like a weft. I pay special attention to blending my natural baby hairs with the lace for a seamless finish.
6️⃣ Trim and Blend
Once everything is sewn down, I remove the clips, fluff the hair, and trim any uneven ends. You can also style the weft with a flat iron, curling wand, or simply finger‑comb for volume. Don’t forget to soften your edges with a light layer of gel and a soft brush.
FAQs about Sew‑In Weave Hair
Is It Better to Sew or Glue Weave?
Sew‑in weaves generally offer more security and are gentler on your edges compared to glue. While adhesives can provide a very flat finish, they risk causing breakage if not removed properly. I recommend sew‑ins for longer wear and healthier hair.
How Long Do Sew-in Weaves Last?
A well‑installed sew‑in weave can last anywhere from 6 to 8 weeks before needing removal or reinstallation. Proper care—such as moisturizing your scalp and protecting your edges—will help you maximize wear time.
Related post: How Long Does A Sew In Last?
Can Your Hair Grow With a Sew In Weave?
Absolutely! Because your natural hair is braided and protected, it experiences less manipulation. Many of my friends notice significant growth under a sew‑in when they keep their scalp nourished and maintain gentle care routines.
Related post: Do Sew-In Extensions Ruin Your Hair?
How Many Bundles Are Enough for a Sew In?
For most women, 3 bundles are adequate for a medium‑volume install. If you have a larger head circumference, prefer extra fullness, or are going for a dramatic length, you might opt for 4 bundles. I often ask my clients to try 3 bundles first and then assess if they need more.
Final Thoughts
Sew‑in weaves are a beautiful way to transform your look while safeguarding your natural hair. By taking the time to prepare your hair properly, select quality materials, and follow each installation step, you’ll achieve a flawless, long‑lasting style. Leave a comment if you have any questions.


