
How to Put on a Wig Cap and Achieve the Perfect Wig Fit
A wig cap is a thin, stretchy fabric that covers your hair or scalp and provides a smooth base for your wig. For many wig wearers, a cap is like a secret tool that makes wearing a wig more comfortable and natural-looking. So, if you are new to wearing a wig cap, let’s dive into the right way to its detailed steps, along with pro tips to elevate your wig game!
Source: UNice
The Importance of Wearing a Wig Cap
Wearing a wig cap might seem like an optional step, but it can make a big difference in how your wig fits, feels, and looks. Here are the main reasons why wearing a wig cap is highly recommended:
👉 Secures your natural hair: A wig cap keeps your hair tucked in place, preventing loose strands from sticking out or shifting under the wig.
👉 Creates a smooth base: It flattens your hair to create an even surface for your wig to sit on, helping the style look more natural.
👉 Adds comfort: Wig caps act as a barrier between your scalp and the wig, reducing friction and helping to avoid irritation.
👉 Improves grip: The cap provides extra friction that helps keep your wig in place throughout the day.
👉 Protects your wig: It minimizes the amount of sweat and oil that reaches your wig, helping it stay clean and last longer.
Whether you have a full head of hair, thinning edges, or a shaved scalp, a wig cap can improve your overall wig-wearing experience.
Step-by-Step Guide to Putting on a Wig Cap
Putting on a wig cap might feel tricky at first, but with the right preparation and a few helpful steps, you can master it quickly. Below is a detailed guide to get you started. Feel free to follow along and make adjustments that work for your hair length and comfort.
Tools You Need
✅ Wig Cap
✅ Wide Tooth Comb or Brush
✅ Hairpins or Bobby Pins
✅ Elastic Hair Ties
✅ Hairspray (optional)
✅ Scalp Moisturizer or Scalp Protector Spray (optional)
✅ Wig Adhesive Spray (optional)
Step 1: Choose the Right Wig Cap
Select a wig cap that fits your head comfortably and matches your skin tone or wig color. Wig caps come in different materials (like thin nylon or breathable bamboo) and shades (nude, brown, black, etc.). I always pick a cap color that is closest to my skin tone or the roots of my wig. This way, if the cap moves a little, it will be less noticeable. If you want to learn the differences, here is a post:
Related post: The Beginner's Guide to Wig Cap
A good fit is the first step to comfort. So, make sure the cap isn’t too tight or too loose: it should stretch to cover your head without pinching. If you have a larger head or thick hair, choose a “large” size cap for extra room.
Step 2: Prepare Your Hair (and Scalp)
Before putting on the cap, gather and flatten your hair as much as possible. If you have no hair (or very short hair), you can skip to the next step. Otherwise, start by combing or brushing your hair back away from your face. Then, secure it flat:
✨ Cornrow Method
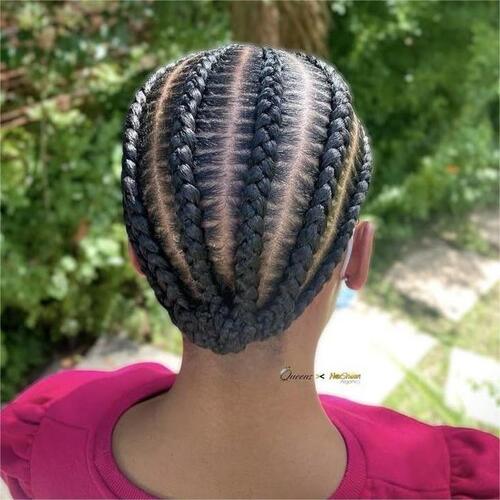
Source: Pinterest
For long hair, you might split it into a few sections and braid each one close to the scalp (cornrow style) to reduce bulk. The more and smaller braids you make, the flatter the cornrows will be along the scalp. Of course, you can also apply some detangling spray to your hair to avoid tangles during the procedure of braiding.
✨ Braid Method
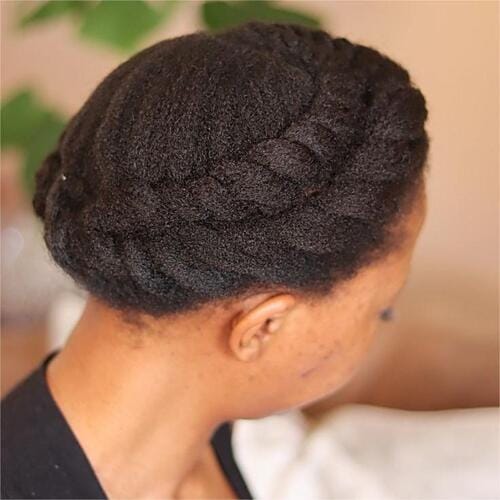
Source: Pinterest
You can choose to try different types of braids and wrap the braids around your head. First of all, you can part your hair into two sections down the middle and then braid each side separately. After finishing braiding, crisscross them against the back of your head to hold them in place. Besides, don't forget to make sure these braids under the wig cap are not very tight. Because if these braids are very tight, they will pull on your hairline.
✨ Bun Method
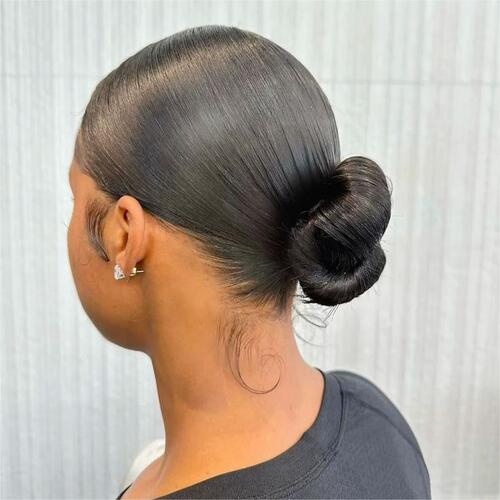
Source: Pinterest
If you have short or shoulder-length hair, nothing is better than making a bun to put your short hair in a wig cap. You can try to pull all of your hair to the back of your head in a low and tight bun, and then secure it with some hairpins. When some short hair or baby hair attempts to slip out of the bun, please spray some hairspray to keep them in place.
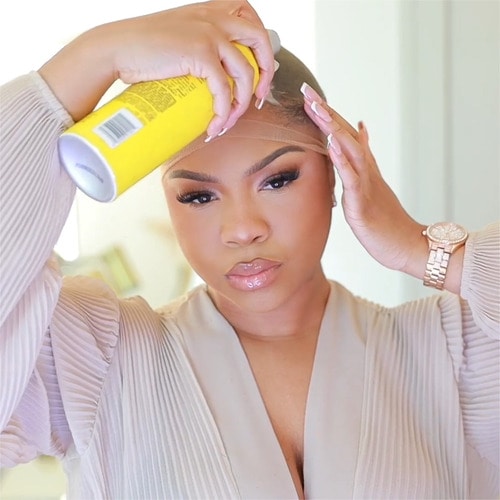
Tip: If you have a sensitive scalp or want extra comfort, consider applying a thin layer of scalp protector spray or even a little scalp moisturizer. This can reduce itching and create a smooth surface for the cap to glide on. I usually spray my scalp lightly and let it dry before continuing. It’s optional, but it can make wearing the cap (and later the wig) feel nicer, especially on hot days.
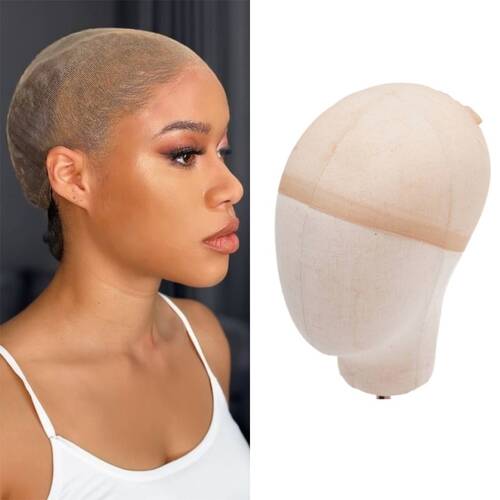
Step 3: Put On and Align the Wig Cap
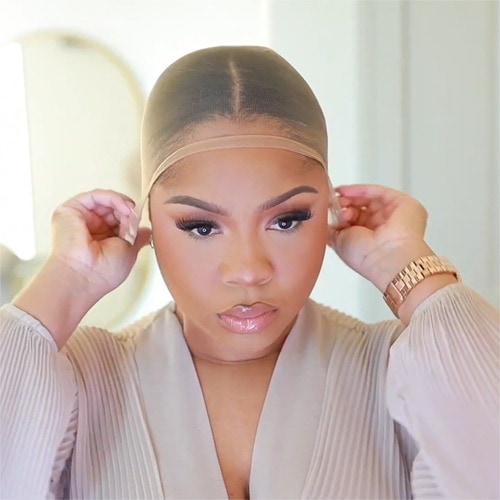
Source: Sophiology
Hold the wig cap by the edge and find the front side (some have a slight curve or larger opening at the front). Pull the cap over your head from front to back, like putting on a swim cap. Start at your forehead and pull it over to the back of your head. As you do this, make sure to align it with your natural hairline. For most people, you’ll position the cap just in front of your hairline and then pull it backward so that no natural hair is peeking out at the front. This placement gives you a realistic hairline when you later wear your wig.
If your hairline is uneven (for example, you have a widow’s peak or some higher spots), don’t worry: aim to cover the lowest or furthest-down point of your hairline.
Step 4: Tuck Away Stray Hairs and Adjust
After the cap is on, check for any loose hairs or flyaways that escaped the hold and are poking out. Use your fingers or a fine-tooth comb to gently push those strands under the cap. I always look around the edges — especially near the temples and nape — and tuck in any stray bit.
Then, take a moment to smooth the cap itself so it lies flat against your head. If you feel a bit of hair bulk in one spot, adjust the braids or pins in your hair underneath until it’s even.
Step 5: Secure the Wig Cap
Once the cap is aligned and all hair is tucked in, you want to keep it from shifting.
The easiest way is with bobby pins. I usually grab a few sturdy bobby pins and slide them over the edges of the cap at key points — for example, one on each temple area and a couple near the nape of my neck. This is quick and painless, and I find it holds the cap snugly without being too tight.
Source: Sophiology
For those who feel they need extra hold, a light wig adhesive spray can be used on the edges of the cap. If you try this, only use a small amount: lift the edge of the cap, mist a little adhesive where it contacts your skin, and press the cap down. This can keep the cap (and wig) from budging, but it should be used carefully. Always test adhesive on your skin first to avoid irritation.
At this point, your wig cap should be perfectly in place. The surface of your head is now smooth, your hair is completely contained, and the cap is secure. You’re ready to move on to putting on your wig on top of this solid base.
Check Best-Selling Wigs at UNice
At UNice, we believe that a great wig starts with a solid foundation, and a good wig cap is just the beginning. Explore our best-selling styles like the BlendAway HD Wigs or the 13x4 Pre-Everything Wigs. These customer favorites pair perfectly with a snug-fitting wig cap to give you a seamless, natural look.
Conclusion
Putting on a wig cap is a simple yet game-changing step for any wig wearer. By choosing the right cap, preparing your hair, and following the steps above, you create a smooth, secure base that makes your wig look its best. I’ve taught many clients that with a little practice, wearing a wig cap becomes second nature – and the payoff is huge confidence in your hairstyle. We hope this guide makes you feel ready and excited to use a wig cap in your routine. Now that your cap is on, go ahead and crown it with your favorite UNice wig – you’re all set to rock your new look!