
Step-by-Step Guide to Making Your Own Wig
Ever thought about the benefits of making your own wig? Creating a wig at home can save you money compared to buying wigs or hiring a professional stylist. Plus, you get full creative control over the design. Imagine customizing every detail to suit your style and preferences.
With the right tools and a bit of patience, learning how to make a wig becomes an enjoyable and rewarding experience. You'll find satisfaction in crafting something unique and personal, all while exploring endless customization options.
Tools and Materials Needed for Making Wigs
Creating your own wig requires some essential tools and materials. Let's dive into what you'll need to get started.
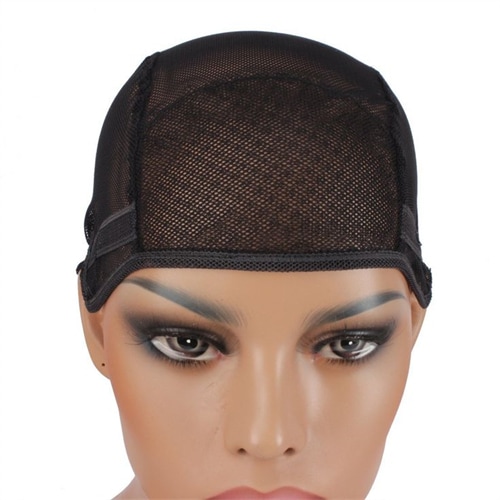
◆ Wig Cap
Source: Pinterest
The wig cap serves as the foundation of your wig. It holds everything together. Choose a cap that fits your head size comfortably. You can find these in various materials, like mesh or nylon, which offer different levels of breathability and stretch.
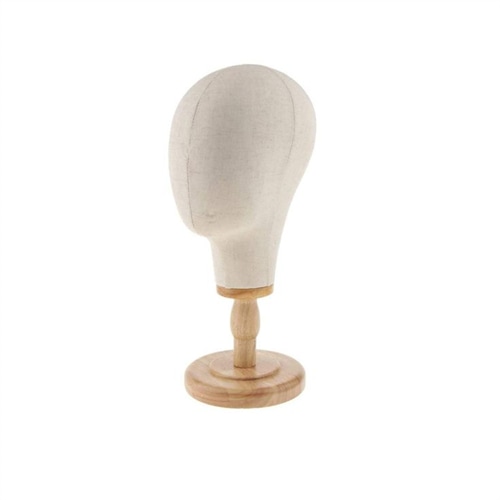
◆ Wig Stand
Source: Pinterest
A wig stand is crucial for stability while you work. It keeps your wig in place, allowing you to focus on styling and construction. You can opt for a simple tabletop stand or a more advanced mannequin head for a realistic fit.
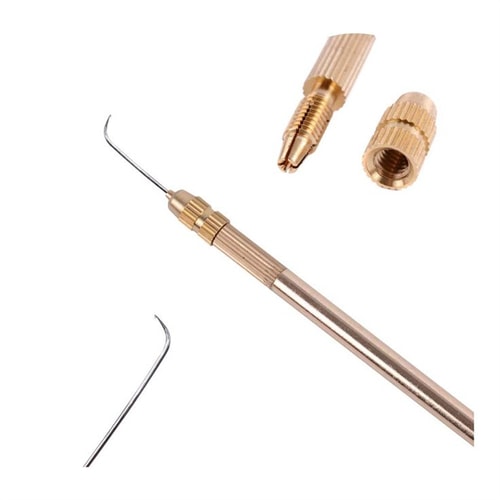
◆ Needles and Thread
Source: Pinterest
You'll need needles and thread to sew the hair wefts onto the wig cap. Curved needles work best for this task, as they allow you to maneuver easily around the cap. Choose a strong thread that matches the color of your hair wefts for a seamless look.
◆ Hair Weft, Lace Frontal or Closure
Hair wefts are the strands of hair you'll attach to the wig cap. You can choose from synthetic or human hair, depending on your budget and desired look. "Natural hair look more realistic, tends to be more durable, and can tolerate heat and other styling products better. On the other hand, wigs made from real hair must be restyled after washes, the color can fade with light exposure, and the wigs can become damaged more easily." Hair specialist Nikia Londy said on WikiHow.
◆ Wig Glue or Tape
For those who prefer not to sew, wig glue or tapes provides an alternative method for attaching hair wefts. These adhesives offer a secure hold and are easy to use. Make sure to choose a product that's safe for your skin and won't damage the hair.
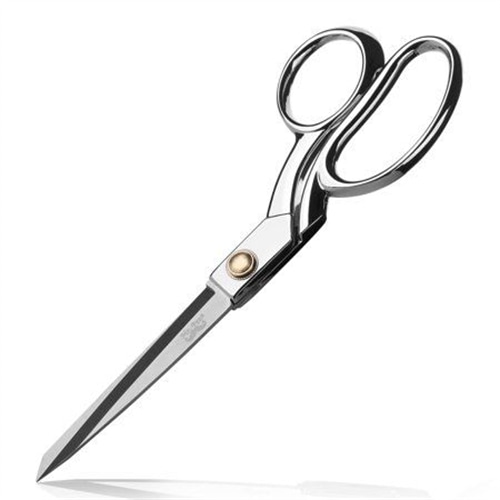
◆ Scissors
Source: Pinterest
A good pair of scissors is essential for cutting and shaping your wig. You'll use them to trim the hair wefts and adjust the wig cap to your desired size. Invest in sharp, high-quality scissors to ensure clean cuts and precise styling.
With these tools and materials at your disposal, you're well on your way to crafting a beautiful, custom wig. Each item plays a vital role in the process, so gather them all before you begin.
Preparing Your Workspace for Making Wigs
Creating a wig requires a well-organized and safe workspace. Let's set up your area for success.
1. Organizing Tools and Materials
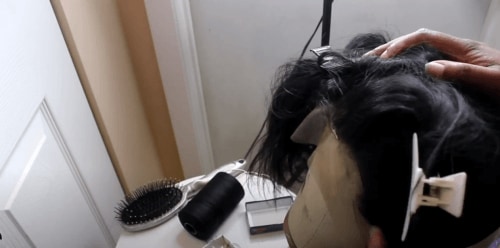
Source: @Fabcocoberry
Start by gathering all your tools and materials in one place. Arrange them neatly on a table or workbench. This organization helps you find what you need quickly. Place your wig cap, hair wefts, needles, thread, scissors, and adhesives within easy reach. Use small containers or trays to keep smaller items like pins and clips from getting lost.
2. Ensuring Adequate Lighting
Good lighting is crucial when making a wig. It helps you see details clearly and reduces eye strain. Position your workspace near a window for natural light. If that's not possible, use a bright desk lamp. Make sure the light source illuminates your work area evenly. Avoid shadows that can make it hard to see what you're doing.
3. Safety Precautions
Safety should always be a priority. Follow these precautions to keep your workspace safe.
4. Handling Sharp Tools
When using sharp tools like scissors and needles, handle them with care. Always cut away from your body to prevent accidents. Keep your fingers clear of the blades. Store sharp tools in a safe place when not in use. Consider using a protective glove if you're new to handling these tools.
5. Working with Adhesives
Adhesives like wig glue or tape require careful handling. Work in a well-ventilated area to avoid inhaling fumes. Follow the instructions on the adhesive packaging. Apply glue sparingly to prevent messes. If you get adhesive on your skin, wash it off immediately with soap and water. Keep adhesives out of reach of children and pets.
How to Make a Wig at Home?
Creating the foundation of your wig is a crucial step in the process of how to make a wig. This foundation ensures that your wig fits comfortably and securely. Let's break it down into manageable steps.
Measuring and Cutting
Measuring Head Size

To start, you'll need to measure your head size accurately. Use a flexible measuring tape for this task. Wrap it around your head, starting at the front hairline, moving over your ears, and ending at the nape of your neck. This measurement will guide you in selecting the right size for your wig cap. A well-fitted cap is essential for comfort and stability.
Cutting the Wig Cap
Once you have your measurements, it's time to cut the wig cap. Lay the cap flat on a table and mark the measurements with a fabric marker. Carefully cut along the lines, ensuring that the cap maintains its shape. Precision here is key. A properly cut cap will form the perfect base for your wig, making the rest of the process smoother.
Securing the Wig Cap
Placing on Wig Stand
Next, place the wig cap on a wig stand. This step is vital in learning how to make a wig, as it provides a stable base for attaching hair wefts. Position the cap so it sits snugly on the stand, mimicking how it would fit on your head. This setup allows you to work hands-free and focus on the details.
Pinning for Stability
To keep the wig cap in place, use T-pins to secure it to the stand. Insert the pins around the edges of the cap, ensuring they hold it firmly without distorting its shape. This stability is crucial as you begin attaching hair wefts. It prevents the cap from shifting, allowing you to work with precision and ease.
By following these steps, you're well on your way to mastering how to make a wig. The foundation you create will support the rest of your wig-making journey, ensuring a comfortable and stylish final product.
Attaching Hair Wefts
Attaching hair wefts is a crucial step in learning how to make a wig. You have two main methods to choose from sewing and gluing. Each method has its own benefits, so let's explore both to help you decide which suits your needs best.
Method 1: Sewing Method
The sewing method offers a durable and secure attachment for your hair wefts, lace frontal or closure. It requires some skill and patience, but the results are worth it.
· Threading the Needle
Start by threading a curved needle with a strong thread. Choose a thread color that matches your hair wefts for a seamless look. Cut a length of thread that's easy to handle, usually about 18 inches. Tie a knot at the end to prevent it from slipping through the weft.
· Sewing Hair Wefts to Cap
Place the first hair weft at the nape of the wig cap. Use T-pins to hold it in place. Begin sewing by inserting the needle through the weft and the cap. Pull the thread through until the knot catches. Continue sewing along the weft, using small, even stitches. Make sure each stitch is tight to secure the weft firmly. Once you reach the end, tie off the thread with a knot and trim any excess.
Method 2: Gluing Method
The gluing method is a popular choice for those who prefer a quicker process. It's especially useful if you're new to how to make a wig.
· Applying Wig Glue
Choose a high-quality wig glue that's safe for your skin. Apply a thin line of glue along the edge of the wig cap where you want to attach the weft and lace frontal. Work in small sections to prevent the glue from drying too quickly. Allow the glue to become tacky before proceeding.
· Pressing Wefts onto Cap
Carefully press the hair weft onto the glued area of the cap. Use your fingers to smooth it down, ensuring full contact with the glue. Hold it in place for a few seconds to allow the glue to set. Repeat this process, working your way up the cap. Overlap each weft slightly for a natural look.
Research on Sewing vs. Gluing Methods for Wig Wefts
Many prefer the gluing method due to the difficulty of sewing through glue.
Styling and Finishing Touches
You've reached the exciting part of your wig-making journey—styling and adding those finishing touches. This step is where your creativity truly shines, allowing you to personalize your wig to match your unique style.
Trimming Excess Hair
Start by trimming any excess hair from your wig. Use sharp scissors for clean cuts. Hold the wig on the stand and gently comb through the hair to identify areas that need trimming. Focus on removing uneven ends and creating a uniform length. This step ensures your wig looks polished and natural.
Shaping the Wig
Next, shape the wig to suit your desired style. Consider the overall look you want to achieve—whether it's sleek and straight or full of curls. Use a razor or thinning shears for a softer finish. Work slowly and check your progress frequently. Remember, it's easier to take off more hair than to add it back.
My finished wig is marvelous and testimony to that expertise," shared Sue. "We left the salon feeling whole again and ready for the next step in recovery."
Final Adjustments
Checking Fit and Comfort
Before you finalize your wig, check its fit and comfort. Place it on your head and adjust the cap if necessary. Ensure it sits snugly without being too tight. A well-fitted wig enhances your confidence and comfort throughout the day. If adjustments are needed, make them now to avoid discomfort later.
Adding Accessories
Finally, add accessories to elevate your wig's style. Consider headbands, clips, or decorative pins to personalize your look. These additions can transform a simple wig into a statement piece. Experiment with different accessories to find what complements your style best.
By following these steps, you've learned how to make a wig that not only fits well but also reflects your personal style. Enjoy the satisfaction of wearing a wig that you've crafted with your own hands, and don't hesitate to experiment with new styles and techniques.
