How to Do a 4-Strand Braid: Easy Tutorial for Beginners
Hello besties! 👋 Tired of the same old, basic braid? Low-key bored with the regular three-strand? Same. Let's vary things up and speak about the 4-strand braid; it seems sophisticated, but I assure you it's not as difficult as it appears. Once you get the hang of it, it will undoubtedly become your new go-to. Ready to slay? Let's do it. 💅
So... What’s a Four-Strand Braid?
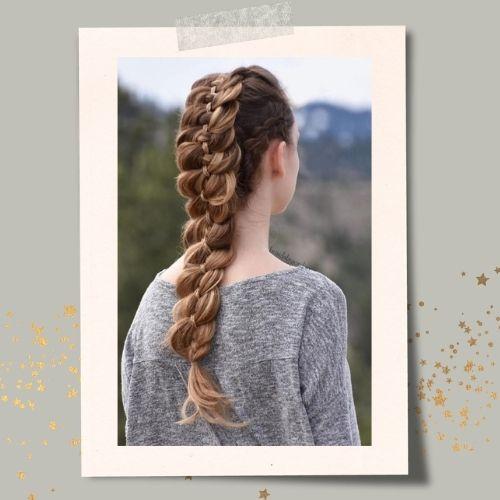
Image source: Pinterest
A four-strand braid is basically an upgraded take on the classic three-strand braid you’ve probably been doing since you were a kid. Instead of working with three sections of hair, you’re working with four—which gives you a thicker, more detailed, and overall cooler look. Depending on how you style it, this braid can lie flat like a ribbon, twist like a rope, or even mimic a chain link pattern. However you wear it, it’s the perfect mix of stylish and fun.
How to Do a 4-Strand Braid?
Grab a brush, a hair elastic, and maybe a clip to section your hair. Let's break it down, step by step. You got this!
You'll Need:
✅ A brush or comb
✅ Hair tie (scrunchies are always a vibe)
✅ (Optional) Texturizing spray or mousse for grip
How to Do:
1️⃣ Prep: Brush your hair till it's smooth. Pro tip: second-day hair or hair with a bit of texturizing spray works WAY better – it has more grip and isn't too slippery.
2️⃣ Section: Separate your hair into four equal portions. Hold two to the left and two to the right. Mentally identify them from left to right as 1, 2, 3, 4.
3️⃣ The Move (This is the Key!):
⚡ Step 1: Move the leftmost strand (strand 1) over the strand 2 and under the strand 3, positioning it between the third and fourth strands.
⚡ Step 2: Take the rightmost strand (strand 4), cross it under strand 3 and over strand 2, positioning it between strands 1 and 2.
⚡ Step 3: Gently pull all four sections to tighten them up a bit. Repeat! Just keep doing that same pattern: far left, over-over; far right, under-under. You'll feel it after a few tries!
4️⃣ Keep Going: Continue the pattern to the end. Don't worry about initial imperfections; practice improves results, and slight messiness adds character.
5️⃣ Secure: When you run out of hair to braid, pop a hair tie on the end. Gently pull on the loops of the braid to pancake it and make it look fuller and less perfect. We're going for chic, not stiff!
5 Popular 4-Strand Braid Ideas You Gotta Try
Once you’ve mastered the basics, it’s time to play around. Here are some ideas to inspire your next look:
Double 4-Strand Braid
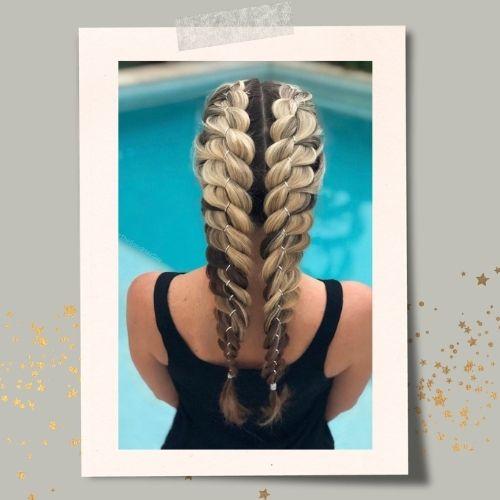
Image source: Pinterest
Part your hair down the middle and make two 4-strand braids—one on each side. It’s giving sporty-meets-street-style. Perfect for concerts, gym days, or just looking cool without trying.
4-Strand French Braid

Image source: Pinterest
Start at the top of your head and add hair little by little as you braid down. It takes practice but looks SO impressive. Ideal for weddings, proms, or just dominating your Instagram feed.
Side 4-Strand Braid

Image source: Pinterest
Sweep all your hair to one side and braid it over your shoulder. Romantic, soft, and perfect with a front tuck. Great for brunch, dates, or when you want to feel like the main character.
4-Strand Round Braid

Image source: Pinterest
This version looks like a rope—it’s 3D and super clean. The trick is keeping tension even and always crossing the outer strands over toward the center.
4-Strand Flat Braid
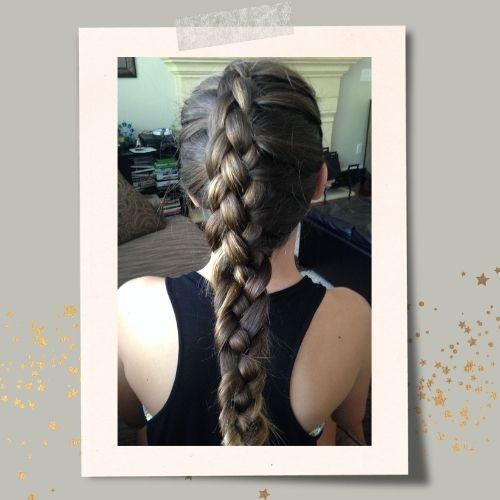
Image source: Pinterest
The classic method we just learned! It lays flatter against your head and has that beautiful woven look. Awesome as a standalone style or understated enough for work or school.
Conclusion
The 4-strand braid might look low-key intimidating, but once you find the rhythm, you’ve got so many ways to style it. From sporty double braids to chic French looks, this braid gives instant main character energy. So next time you’re over the basic three-strand, just grab that extra section and glow up your braid game—trust me, you won’t go back.


