
How to Use Finger Rolling to Enhance Your Natural Curl Pattern
For women with naturally curly hair, finding styling techniques that enhance curl definition without heat or harsh chemicals is a game-changer. Finger rolling is one such method, celebrated for its simplicity and the soft, bouncy coils it delivers. In this post, we'll dive deep into what finger rolling is, walk through a step-by-step tutorial (including a fantastic video guide), and explore its many benefits.

Source: Pinterest
What Is Finger Rolling?
Finger rolling is a hands-on styling technique used to define curls by gently wrapping individual strands around your fingers. Unlike finger coiling, which involves tightening each curl into a precise spiral, finger rolling focuses on encouraging the natural curl pattern with minimal manipulation. The end result is a uniform, elongated curl that still looks and feels soft to the touch.
Related post: Achieve Perfect Finger Coils: A Beginner's Guide
How to Finger Roll Hair: A Detailed Tutorial
Below is a text-based walkthrough of the process. If you prefer a visual demonstration, check out this helpful video tutorial by @Blanca Vazquez. It perfectly complements the written steps and shows you exactly how it's done in real time.
Step 1: Start with Clean, Damp Hair
I always begin with freshly washed and conditioned hair. Damp hair holds product well and allows the curls to set properly. Just gently blot excess water with a microfiber towel or a cotton T-shirt to minimize frizz.
Step 2: Apply Your Favorite Curl Cream or Gel
Dispense a quarter-size amount of styling product into your palms, rubbing them together to distribute evenly.
Working in sections (I like to start at the nape), rake the product through to ensure every strand is coated.
Step 3: Roll Small Strands Around Your Finger
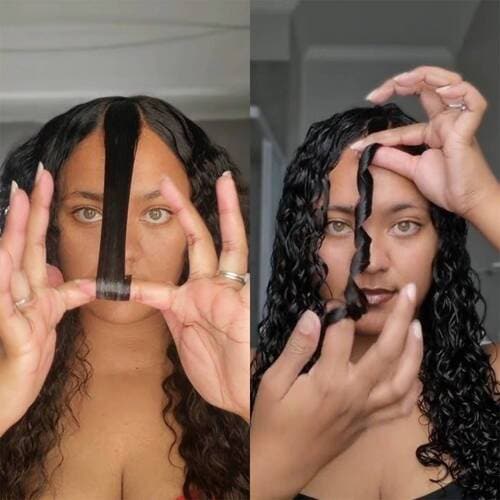
Take a small strand of hair, and wrap it around your index or middle finger from the end. Roll gently from the ends toward the root, maintaining light tension. Hold the roll in place for a few seconds to help it “set,” then release.
Step 4: Repeat Across Your Head
Continue rolling strand by strand. If you notice frizz or flyaways, smooth a tiny bit more product over the surface before rolling.
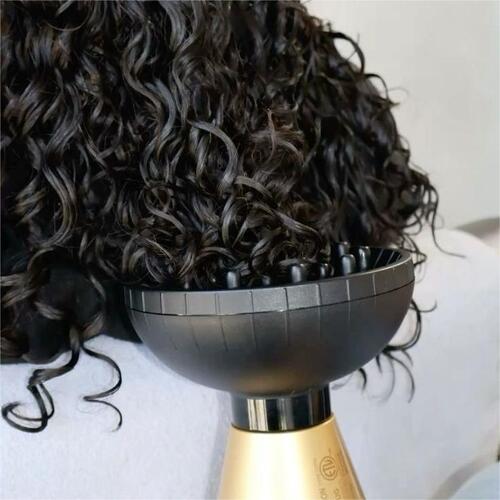
Step 5: Air-Dry or Diffuse
Source: Pinterest
For the softest finish, allow your hair to air-dry completely. If you're short on time, use a diffuser on low heat and speed settings to gently accelerate drying.
Step 6: Fluff and Separate (Optional)
Once dry, you can gently separate larger curls for extra volume. I usually flip my head upside down and softly shake the roots, then use a pick or my fingers to fluff.
What Are the Benefits of Finger Rolling?
Finger rolling comes with a variety of perks that make it worth the extra effort:
❤ Heat-Free Styling: No need for curling irons or wands; your natural texture does all the work.
❤ Enhanced Definition: Encourages consistent curl shape from root to tip.
❤ Long-Lasting Hold: Curls maintain their form for days when done correctly, especially if you pineapple or wrap at night.
❤ Minimal Damage: Less manipulation means fewer breakage risks.
❤ Versatility: Great for wash-and-go routines, updos, or half-up styles.
Finger Rolling VS Finger Coils: What Is the Difference
Finger rolling and finger coiling are often confused, but they serve different purposes and cater to different curl types and styling needs. Here's a breakdown of how they differ, and which hair types each method works best for:
| Factor | Finger Rolling | Finger Coiling |
| Definition | Gently rolling small sections of hair around your finger to define the natural curl pattern | Twisting individual strands tightly around your finger to create defined coils |
| Curl result | Looser, bouncier curls that follow your hair’s natural shape | Very tight, springy spirals with high definition |
| Time required | Moderate (larger sections, quicker to style) | Time-consuming (smaller sections, more precision needed) |
| Hold & longevity | Lasts several days with proper care and light refreshing | Long-lasting with strong hold, often used as a protective style |
| Styling ease | Beginner-friendly, great for casual, everyday looks | Requires more technique, often used for formal or special occasion styling |
| Best for hair types | Suitable for all natural curl types (2C to 4C); especially helpful for enhancing existing pattern without tight manipulation | Ideal for tighter coils and kinks (3C to 4C), particularly 4A–4C textures that benefit from controlled definition |
Conclusion
If you're looking to amplify your natural curl pattern without heat or heavy manipulation, finger rolling is definitely worth a try. It strikes a wonderful balance between definition and flexibility, giving your curls shape without stiffness. Plus, the technique is gentle, customizable, and fits seamlessly into a wash-and-go routine. Give it a go on your next styling day!