Get Those Corkscrew Curls — A Friendly, No-Fuss Guide
Corkscrew curls are the kind of hair that greets you in the mirror with a little bounce — lively, punchy, and full of personality. If you’ve been wanting tight, well-defined coils that look like tiny springs, this is a down-to-earth guide for getting them at home (yes, I include a corkscrew curls tutorial).
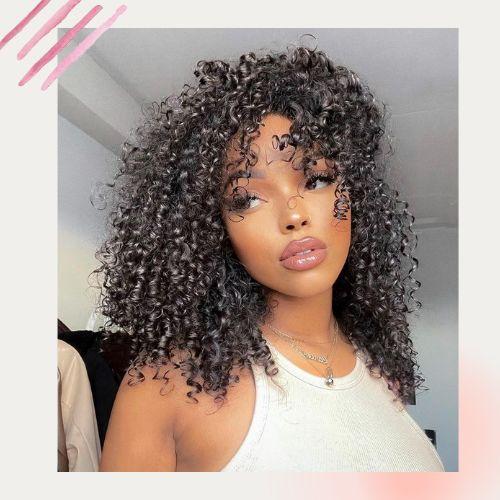
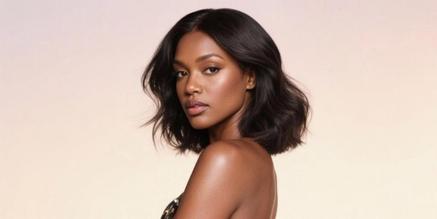
Image source: Pinterest
What Are Corkscrew Curls
Think of corkscrew curls as tiny helices that travel the full length of the strand. They’re usually narrow — about the width of a straw or pencil — and have a neat, springy look. Each coil tends to hold its own shape, so the hair looks textured and lively instead of limp or frizzy. They often show a lot of shrinkage, so hair that looks long and straight can sit much shorter once those coils form.
What Hair Type Is Corkscrew Curls
Image source: Pinterest
These curls show up most often in naturally curly and coily textures. People with 3C to 4A hair tend to see corkscrews naturally, but with the right products and technique, you can recreate the look on looser curls too. The things that help corkscrew curls look best are moisture, good clumping, and a little hold — very fine hair can struggle to keep tight coils, and very coarse hair might need extra conditioning so the coils feel soft rather than stiff.
How to Create Corkscrew Curls
If you want quick, uniform corkscrew curls, reach for a small-barrel curling wand — that’s the trick most creators use. Below is a simple, practical corkscrew curls tutorial using a wand that you can follow at home.
Step 1: Prep Your Hair
Wash and condition, then towel-blot until damp. Apply a heat protectant and a small amount of mousse or curl cream to give the curls grip.
Step 2: Pick the Right Wand
Use a thin barrel — about 3/8" (9–10 mm) to 1/2" (12 mm) — for tight corkscrews. A clampless wand works best because you can wrap the hair neatly around the barrel. If your wand gets very hot, use a lower setting for fine hair and a higher one for thick, coarse hair.
Step 3: Section Small
Divide hair into small sections, about ½" to 1" wide. Smaller sections equal tighter, more defined corkscrews. Clip the rest away so you can work methodically.
Step 4: Smooth and Wrap
Smooth one subsection with a comb or your fingers, then wrap the strand tightly around the wand, starting near the root and rolling down to the tip. Keep the wrap snug so the coil sits uniformly on the barrel. For consistent corkscrews, wrap every piece in the same direction (usually away from your face).
Step 5: Hold, then Release
Count or time it — generally 8–12 seconds works, but thicker hair may need a bit longer. Let the curl cool on the wand for a second if possible, then slide it off gently. Cooling helps the coil set.
Step 6: Repeat Across the Head
Continue section by section. Take your time at the front hairline so those curls look neat and frame the face. Cool completely before touching.
Step 7: Separate With Care
Use an oil-dabbed fingertip to lightly separate and fluff the curls at the ends if you want more volume. Keep the separation minimal to preserve the tight helix look.
⌛Tip: Mist with a light-hold spray or anti-frizz spray to keep definition without crunch. For extra longevity, sleep with a satin bonnet or loosely “pineapple” your curls at night.
What Is the Difference Between Spiral and Corkscrew Curls?
They look close, but there are differences:
- Size: Spirals are usually larger; corkscrews are tight and narrow.
- Shape: Spirals have a more open loop; corkscrews form compact helices.
- Movement: Spirals sway and flow; corkscrews have a bouncier spring.
- How you make them: Big curling irons or loose braids give spirals. Small sections and thin rods or finger-coiling give corkscrews.
Knowing which effect you want helps pick the right tools and section size.
Wig Options for Corkscrew Curls
If you want those coils right away, a corkscrew curl wig is a handy option. Wigs come pre-styled, so you skip the hours of setting and drying. Pick a cap and lace type that you’re comfortable with, and treat the wig like real curly hair: keep it moisturized, detangle gently from ends up, and avoid heavy product buildup. A well-kept corkscrew curl wig gives instant volume and a playful, natural look.
Final thoughts
Corkscrew curls are fun and full of life. The look is about texture, definition, and movement. Try the corkscrew curls tutorial, tweak the section size and products to fit your hair, and have fun with it. If you ever want a shortcut, a wig is an easy way to get the same springy vibe without the daily styling.