Comb Coils 101: Your Ultimate Guide to Rocking This Style
Hey there, curly friends! If you’ve ever scrolled through hair inspiration pages or wandered into a natural hair community, you’ve likely stumbled upon the magic of comb coil locs. These tiny, spring-like curls are not just adorable—they’re a versatile starting point for many protective styles and loc journeys. As someone who’s obsessed with coils, let’s unravel everything you need to know about this low-maintenance, high-reward hairstyle.
Source: Pinterest
Introduction to Comb Coils: What’s the Buzz?
Comb coils are small, tightly wound curls created by twisting sections of hair with a fine-tooth comb. They’re a cornerstone of natural hair care, especially for Type 4 textures, and serve as a foundation for styles like locs or simply as a standalone do.
But what makes comb coils so special? It’s the balance of simplicity and finesse. With the right tools, patience, and some serious hand skills, this style delivers a timeless yet fresh spin on natural hair.
How to Do Comb Coils
If you’re ready to bring those coils to life, here’s a step-by-step guide to achieve the perfect comb coils at home or in the salon.
What You’ll Need:
✅ Fine-toothed comb (rat tail combs work best)
✅ Leave-in conditioner or curl cream
✅ Hair gel or twist-holding product
✅ Spray bottle with water
✅ Sectioning clips
Steps to Create Comb Coils
1️⃣ Prep Your Hair: Freshly washed hair grips better. I prefer using a leave-in conditioner for slip and moisture.
2️⃣ Section Your Hair: Divide your hair into small sections based on the thickness and size of coils you prefer. Use sectioning clips for control.
3️⃣ Start Twisting: Using the fine end of the comb, root the comb at the base of the section. Twist the comb while gliding it through the strand, allowing the hair to coil around itself.
4️⃣ Secure the Coil: Once the coil forms, gently release it from the comb. A light gel or wax can keep coils intact, but heavy products should be avoided to prevent buildup.
5️⃣ Repeat: Continue the process, section by section, until your entire head is coiled.
Your patience will pay off as you admire those bouncy, on-point coils!
Taking Care of Comb Coils: Keep Your Spirals Happy!
So, you’ve got your comb coil locs installed—yay! Now, how do you keep them looking fresh and thriving? As someone who’s navigated the frizz, the shrinkage, and the occasional “Why does my scalp itch?!” phase, here’s my no-nonsense guide to coil care:
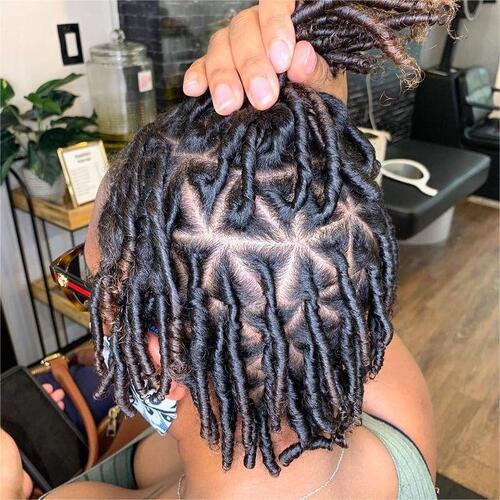
Source: Pinterest
1. Hydration is Non-Negotiable
Comb coils love moisture, but heavy products can weigh them down. I spritz mine with a water-and-aloe mix every few days to keep them bouncy. For extra softness, a lightweight leave-in conditioner works wonders—just avoid greasy formulas that attract lint.
2. Cleanse Gently
Yes, you can wash comb coil dreads! Use a diluted sulfate-free shampoo and focus on your scalp to prevent unraveling. I massage with my fingertips (not nails!) and rinse with cool water to maintain definition. Afterward, let your coils air-dry fully—sleeping on damp hair is a frizz fest waiting to happen.
3. Nighttime TLC
A satin or silk bonnet is your coil’s BFF. I’ve learned the hard way that cotton pillowcases = instant frizz and flattened curls. For extra protection, try loose pineapple-style wrapping with a satin scarf.
4. Retwist with Care
Retwisting too often can weaken your roots. I stick to every 3–4 weeks, using a tiny bit of natural gel or edge control. Pro tip: Don’t twist soaking-wet hair—slightly damp strands hold better.
Related post: How to Retwist Locs: A Complete Instructional Guide
5. Know When to Let Go
Even the best coils have a lifespan. If your ends are fraying or your scalp needs a breather, take them down gently with conditioner and give your hair a break. My rule: If styling feels like a chore, it’s time to reset.
How Long Do Comb Coils Last?
With proper care, comb coils can last 1–3 weeks. Factors like hair texture, product use, and nighttime protection (satin bonnets forever!) play a role. My 4C hair tends to frizz faster, so I refresh edges weekly with a dab of water and oil.
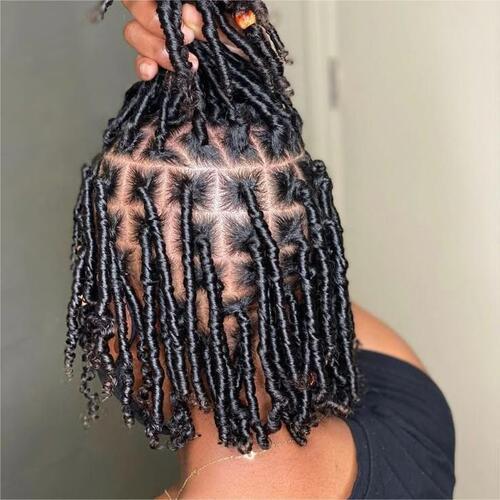
Do Comb Coils Get Thicker Over Time?

Source: Pinterest
Yes and no. Fresh coils might appear slim, but as hair grows and the style matures, they often plump up. For loc seekers, this thickening is part of the “budding” phase. If you’re wearing coils temporarily, they’ll stay relatively consistent in size.
How Much Do Comb Coils Cost?
Salon prices range from 80–200+, depending on length, density, and location. DIY-ing saves cash, but if you’re new to coiling, treat yourself to a pro install for the first round. Trust me, your wrists will thank you.
How Often Should You Retwist Comb Coils?
Retwist every 2–4 weeks to maintain neatness. Over-twisting can stress roots, so balance is crucial. I’ve learned to embrace a little frizz—it adds character!
Can Comb Coils Turn Into Dreads?
Absolutely. Comb coil dreadlocks can be an excellent starter method for locs. Because the hair is already divided and twisted into coiled sections, it provides a strong foundation for loc formation. Depending on your hair type and how often you maintain the style, your comb coils can naturally transition into starter locs within a few months.
Related post: Dreads vs Locs: Differences and Choosing the Perfect Style
Are Finger Coils and Comb Coils the Same?
Nope! Finger coils are shaped by hand (great for looser textures), while comb coils rely on a comb for tighter, uniform spirals. The look can end up slightly different, with comb coils on natural hair appearing more defined and polished.
Conclusion: Coils, Confidence, and You
If you’re ready to take your natural hair game to the next level, why not give comb coils styles a try? Whether you DIY or turn to a trusted stylist, this versatile style ensures you’ll wear your hair confidently and beautifully. Got coil stories or tips? Share them below—I’d love to geek out with you!