Cascading Curls That Flow: A Simple Guide to Hair with Movement
There’s a certain charm in curls that fall so effortlessly like they’re gently tumbling into place. Once you’ve tried cascading curls, it’s hard not to fall in love with how effortlessly they put together they make you feel. In this blog, I’ll walk you through a few simple ways to create this look at home—no need to be a pro, just a bit of patience and the right technique.
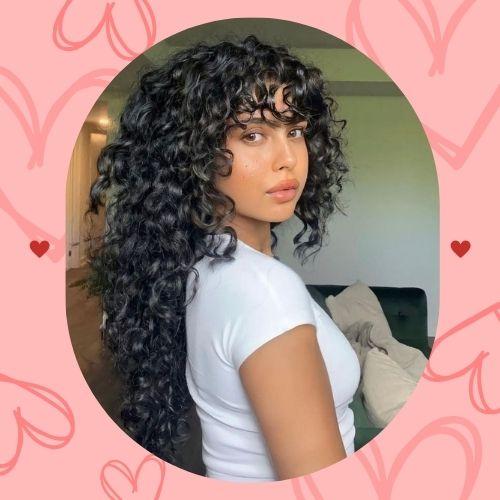
Source: Pinterest
What Makes Cascading Curls So Special
What sets cascading curls apart is how effortlessly they combine softness, structure, and shine. Each curl plays its part in creating a style that feels full of motion yet never overdone.
✨Soft Transitions: Gentle shifts in curl size create a dynamic look, allowing shorter layers to blend seamlessly with longer lengths.
✨Even Distribution of Bounce: Ringlets aren’t confined to the tips or mid‑section—your entire hair has life and movement.
✨Enhanced Shine: Curved surfaces catch and reflect light, making hair appear richer and more vibrant.
How to Do Cascading Curls: 4 Simple Methods
There’s more than one way to create cascading curls—and that’s part of what makes them so fun. Depending on your mood, your schedule, or how much effort you feel like putting in, you can go for heat styling or something softer and heat-free.
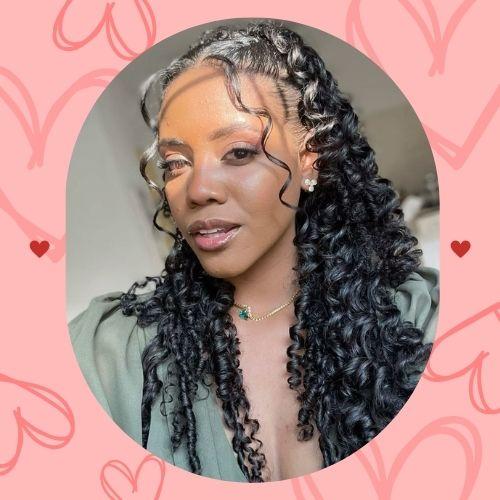
Source: Pinterest
Here are four methods I’ve personally tried (or seen work wonders on friends), each giving its own version of that soft, flowing, layered curl pattern that makes cascading curls so beautiful.
1. Curling Wand (Defined, Bouncy Curls)
This is probably the quickest way to get those full, flowing, cascading curls that really turn heads.
- I like to start by spraying on a heat protectant, then sectioning my hair into three layers—bottom, middle, and top—so it’s easier to work through. I take a small piece from the bottom layer and wrap it around the curling wand.
- Once I’ve finished curling everything, I give it a minute or two to cool, then gently separate the curls with my fingers. That’s when the magic really happens—they soften and fall beautifully, with just the right amount of bounce and movement.
If you're a visual learner like me, this video tutorial is a great guide—it really helped me get the hang of the wrapping technique.
2. Hot Rollers (Full-Body, Glamorous Curl)
Perfect for when you want maximum volume and a touch of retro polish.
- I roll sections of dry hair onto the hot rollers and pin them up. While the rollers work their magic, I usually relax or finish getting ready.
- Once I take them out, I carefully separate the curls with my fingers, and voilà—hello, volume and bounce!
3. No-Heat Braids (Soft and Natural Waves)
This is one of my favorite go-to styles for low-maintenance days or when I want to skip the heat.
- At night, I lightly dampen my hair, work in a little mousse, and braid it loosely before heading to bed. In the morning, I simply undo the braids and gently run my fingers through the waves.
- The result is a soft, tousled texture that feels effortless, like the kind of hair that just falls into place on its own.
4. Pin Curls (Classic and Heat-Free)
Vintage pin curls are such a timeless method—and they actually work beautifully for cascading curls too.
- I like to take small damp sections of hair, wrap them around my finger, and pin them flat to my scalp.
- If I have the time, I let them air dry overnight, but when I’m in a hurry, I’ll sit under a hooded dryer instead.
- Once they’re completely dry, I gently unpin each curl and separate them with my fingers. The way they fall into soft, layered waves always feels a little magical.
Style It Your Way
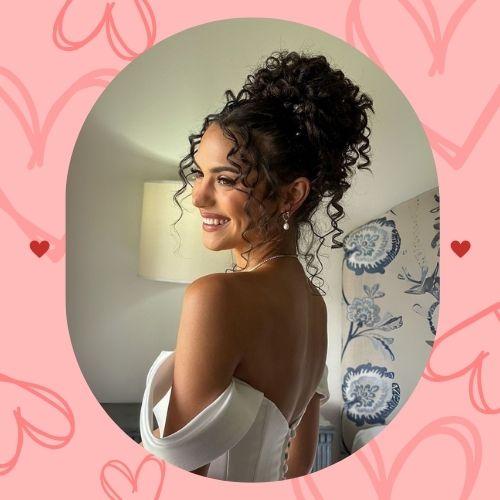
Source: Pinterest
Once you’ve created your cascading curls, the real fun begins. This style isn’t just pretty when worn down—it’s a dream for versatile looks. Pull the curls into a romantic half-updo, sweep them into a voluminous low ponytail, or pin them into a soft bun with pieces left out to frame the face. The dimension and natural flow make it super easy to dress up or keep casual.


