Master the Upside Down Braid with Ease, A Step-by-Step Guide
Are you looking to give your hair a twist, why not try an upside down braid? This creative braid starts at the nape of the neck and works its way up, perfect for updos, ponytails, or even casual looks. Don't worry if it seems difficult at first. As someone who has spent years trying to braid my hair (and experienced many tangled accidents), I'm here to share my experience. With practice, you'll become a master.
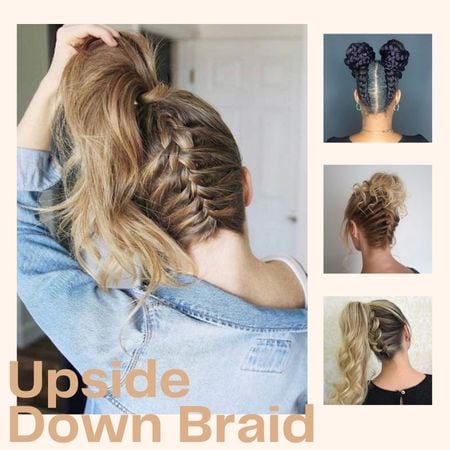
Source: Pinterest
Why the Upside Down Braid?
Before diving into the tutorial, let’s talk about why this braid deserves a spot in your hairstyle repertoire. Unlike traditional braids that sit on top of your hair, the upside-down braid starts at the nape of your neck and cascades upward, creating a stunning 3D effect. It’s perfect for weddings, date nights, or even adding a touch of sophistication to a casual outfit. Plus, it works beautifully on all hair types—whether your locks are fine, thick, curly, or straight.
How to Braid Upside Down
Ready to dive into this braid tutorial? Learning how to braid upside down might seem tricky at first, but it’s easier than you think. With the right tools and a little patience, you’ll be creating stunning hairstyles in no time. Let’s get started! You can learn from the upside down braid tutorial video below.
What You’ll Need
Gather these tools to set yourself up for success:
✅ A fine-tooth comb or teasing brush
✅ Clear elastic bands (small and medium)
✅ Hair clips or bobby pins
✅ Light-hold hairspray or texturizing spray
✅ Optional: A mirror to check the back of your head (trust me, this helps!)
Step 1: Prep Your Hair
Start with clean, dry hair. If your hair is freshly washed, I recommend spritzing a texturizing spray or dry shampoo at the roots. This adds grip, making it easier to braid. Brush out any tangles, and decide where you want your braid to sit—centered, off to one side, or even as a crown braid. For beginners, a classic center braid is easiest.
Step 2: Flip It, Braid It
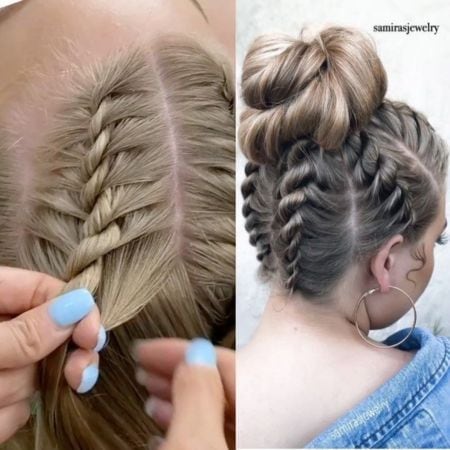
Source: Pinterest
Here’s where the magic happens:
⌛ Flip your hair forward: Bend at the waist and let your hair fall toward the floor.
⌛ Divide the ponytail: Section off a small triangle of hair at the base of your neck. This will be the starting point for your braid.
⌛ Start braiding upside down: Divide the sectioned hair into three equal strands. Begin a classic three-strand braid by crossing the right strand over the middle, and then the left strand over the middle.
⌛ Keep braiding upward: Keep your hands close to your scalp to maintain tension. This helps the braid stay neat and secure. Work your way up toward the crown of your head, making sure to add hair evenly from both sides.
✨ Aha Moment: If your arms get tired (they will!), take a breath. This is why practicing over a couch or bed helps!
Step 3: Secure and Adjust
Once you’ve braided as far up as desired (usually to the crown of your head), secure the end with another elastic. Carefully flip your hair back into place. Now, admire your handiwork in the mirror! If the braid looks too flat, gently tug on the outer loops to loosen them and create volume.
✨ Troubleshooting Tip: Notice gaps or uneven sections? Use bobby pins to tuck stray hairs or reinforce the braid’s base.
Step 4: Final Touches
Mist your braid with a light-hold hairspray to keep flyaways at bay. For a bohemian twist, wrap a ribbon around the base or add tiny flowers. If you’re going for a sleek look, smooth the top of your hair with a drop of serum.
Practice Makes Polished
The first time I tried an upside-down braid, it looked more like a tangled rope than a runway-ready ‘do. But after a few attempts (and a lot of YouTube tutorials), it clicked. I also found that braiding in front of a TV made the process feel less tedious, multitasking for the win!
Common Mistakes (and How to Avoid Them)
Even with practice, you might run into a few hiccups while perfecting your upside down braid. Don’t worry—it’s all part of the learning process! Here are some common issues you might face and how to fix them.
❌ Getting tangled: Always brush your hair thoroughly to remove knots.
❌ Braiding too tightly: This creates a “scalp strain” look. Keep tension light for softness.
❌ Rushing the flip: After securing the braid, flip your hair back slowly to avoid tangles.
❌ Braid not staying secure: For extra hold, wrap the elastic to secure the end of your braid around a few extra times.
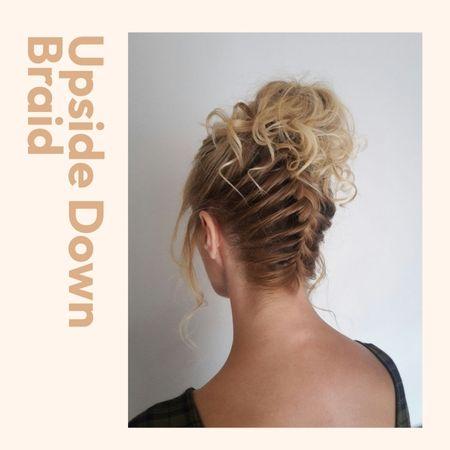
Styling Tips and Creative Upside Down Briads Ideas
Now that you’ve mastered the basics of the upside down braid, it’s time to get creative! This braid is like a blank canvas, ready for you to add your personal touch. Let’s explore some fun ideas and tips to elevate your braid game.
Upside Down French Braid with Curls
Source: Pinterest
A modern twist on classic elegance, which is perfect for bridal editorials or red-carpet features, it balances structure and romance—ideal for those seeking a look that’s polished yet effortlessly soft.
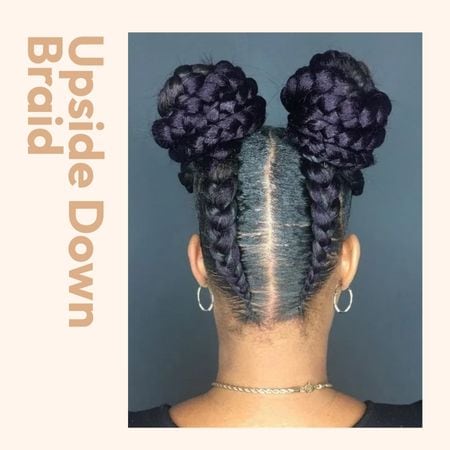
Upside Down Dutch Braid Pigtail

Source: Pinterest
Edgy yet playful, this double Dutch braid begins at the nape, twisting upward into twin pigtails for a bold contrast of texture and movement. Its raised, 3D braiding adds avant-garde flair, making it a standout for street-style spreads or festival-inspired shoots.
Upside Down Braid Ponytail
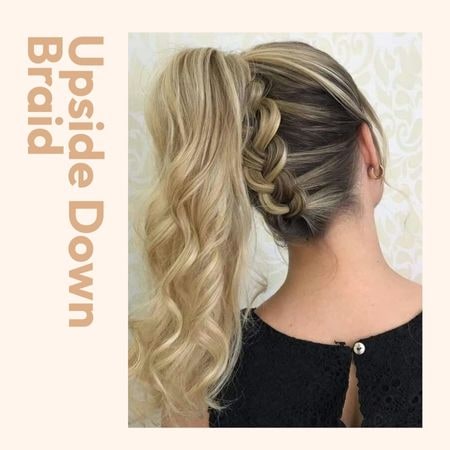
Source: Pinterest
Clean lines meet subtle intrigue: A single inverted braid starts the nape, merging into a high, sleek ponytail. Minimalist yet striking, it’s a go-to for athleisure editorials or power-dressing narratives.
Upside Down Braid Bun
Source: Pinterest
Sophistication with a secret: The braid weaves upward into a tight, sculpted space bun, creating illusionary volume at the crown. Add a middle part and face-framing tendrils for Old Hollywood nostalgia—or keep it stark for futuristic minimalism.
FAQs about Upside Down Braids
Do you have questions about the upside down braid? You’re not alone! Here are some common questions readers like you have asked. Let’s clear up any confusion and help you perfect this fun hairstyle.
How Long Does It Take To Master the Upside Down Braid?
It depends on how often you practice. Most people get the hang of it after a few tries. Spend 10–15 minutes a day practicing, and you’ll see improvement in no time. Remember, patience is key!
Can I Do an Upside Down Braid on Short Hair?
Yes, you can! If your hair is at least chin-length, you can create a mini upside down braid. Use small sections and secure them tightly. For very short hair, try adding extensions for extra length.
✨ Tip: Use bobby pins to secure shorter strands that might stick out.
How Do I Make My Braid Look Fuller?
Gently tug on the sides of the braid to loosen it and create volume. This technique, called “pancaking,” gives your braid a thicker, more dramatic look. Don’t pull too hard, or you might undo your hard work!
Conclusion
Mastering the upside down braid isn’t just about nailing a hairstyle, it’s about embracing the joy of trying something new. Sure, your first attempt might not be Instagram-perfect, but that’s okay. With patience and practice, you’ll soon be turning heads with this elegant, timeless look.
So grab your comb, flip that hair, and let your inner hairstylist shine. And when you finally nail that braid? Tag UNice Hair in your photos—I’d love to celebrate your success!