
8 Common Sew-In Braid Patterns: Styles, Prep, and Care Tips
When it comes to protective styles, sew-ins remain a trusted favorite, offering both versatility and longevity. But behind every flawless install is a braid pattern that lays the foundation. Whether you're going for a sleek middle part or a voluminous ponytail, the right braid pattern ensures your sew-in not only looks good but feels comfortable and lasts longer.
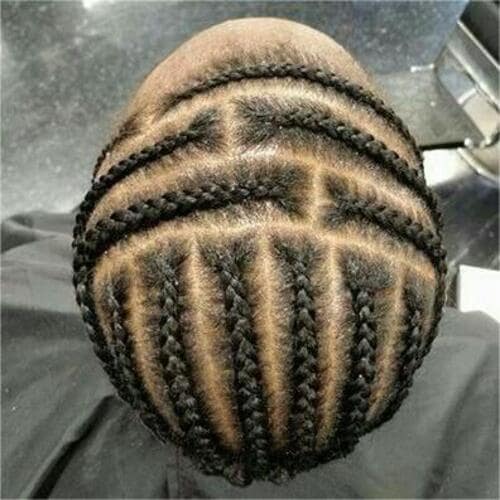
In this guide, we'll break down everything you need to know about braid patterns for sew-in weave: how to prep your hair, the most popular braid styles (with visuals!), how to choose the best one for your look, and how to care for your scalp underneath.
Source: Pinterest
Getting Started: Hair Prep & Supplies
Before any braiding begins, proper preparation is essential. Start by thoroughly washing and deep conditioning your hair to remove any buildup and ensure it's well moisturized. A clean, healthy scalp will reduce itchiness and promote growth during your install.
Here's what you'll need:
✅ Moisturizing leave-in conditioner
✅ Wide-tooth comb and rat-tail comb
✅ Edge control or gel
✅ Weaving thread and needles
✅ Hair clips and sectioning tools
Trim your ends if needed, and be sure your hair is fully detangled before braiding begins.
8 Popular Sew-In Braid Patterns (with Style Inspiration)
Straight Back (Cornrows)
Source: Pinterest
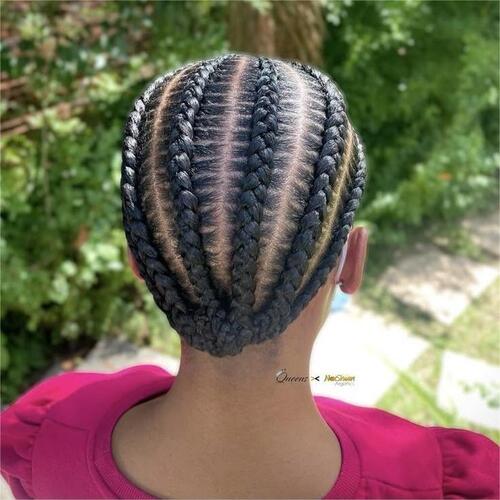
This classic pattern involves braiding the hair straight back in parallel rows. It's ideal for basic sew-ins, especially with a closure. Simple, fast, and clean, this is a go-to for beginners or anyone wanting a full-coverage style. But it may not provide the most natural parting options.
Beehive Braid Pattern
Source: Pinterest
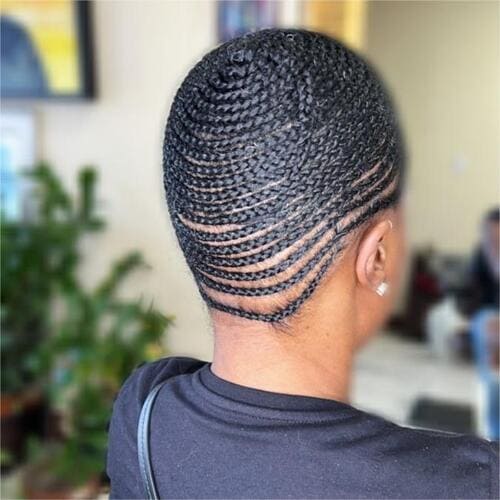
The beehive is a spiral pattern that starts from the outer perimeter and wraps toward the crown. It's perfect for full sew-ins and wig installs where no leave-out is required. Just make sure the top is flat for a smooth finish, or it can be bulky in the crown if not done flat.
Sew In Braid Pattern with Leave Out
Source: Pinterest
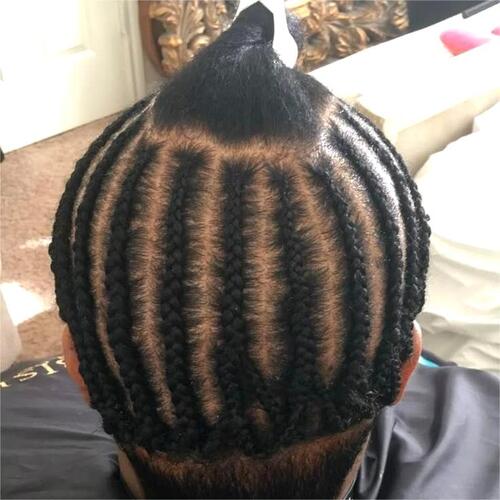
This pattern leaves a section of your natural hair out, often around the part or edges, allowing it to blend seamlessly with your extensions. It's best for partial sew-ins, offering a natural hairline and versatile parting.
Related post: How To Do A Sew In With Leave Out?
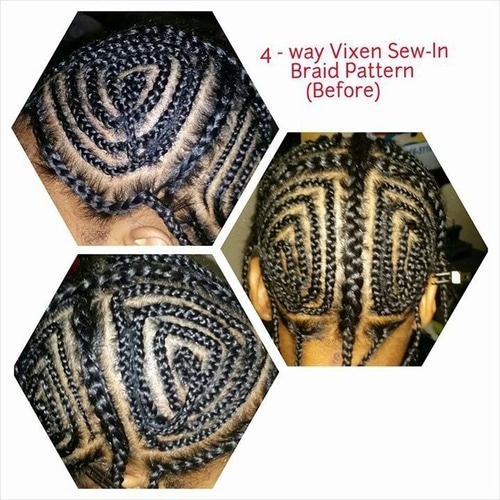
Vixen Sew In Braid Pattern
Source: Pinterest
The vixen is a highly versatile option, usually sectioned into four parts with a leave-out in between. It lets you wear your hair in ponytails, braids, buns, and multiple parts. This is a great choice if you like to switch up your look regularly. The downside is that it's time-consuming, which is why it's not as commonly used these days.
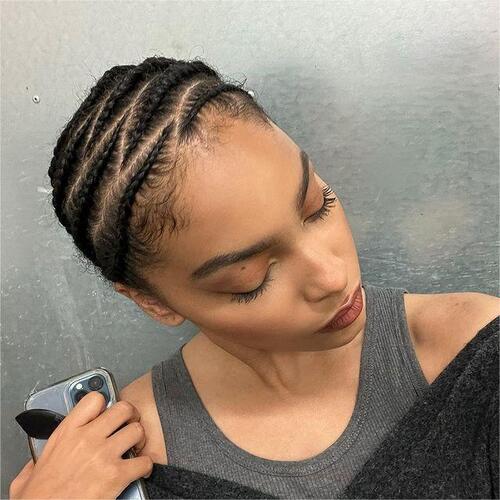
Zig-Zag Sew In Pattern
Source: Pinterest
Braided in a continuous zig-zag formation, this pattern lies flatter than traditional cornrows, distributing tension evenly across the scalp. It's often used for full installs where flexibility and a smooth finish are key.
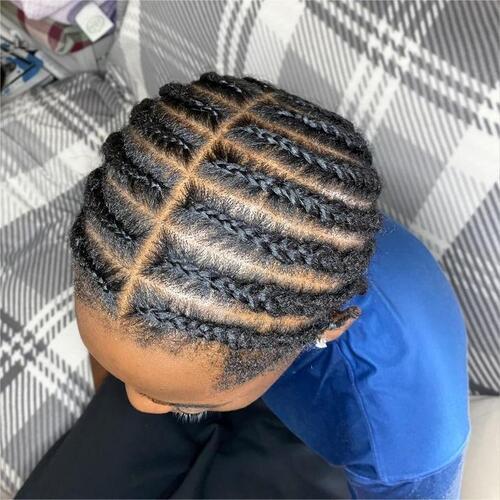
Middle Part Braid Pattern
Source: Pinterest
This layout creates a natural middle part, either with a closure or a leave-out. The braids curve slightly away from the part to ensure the hair falls naturally. It's ideal for sleek, center-part styles like bone-straight or layered installs.
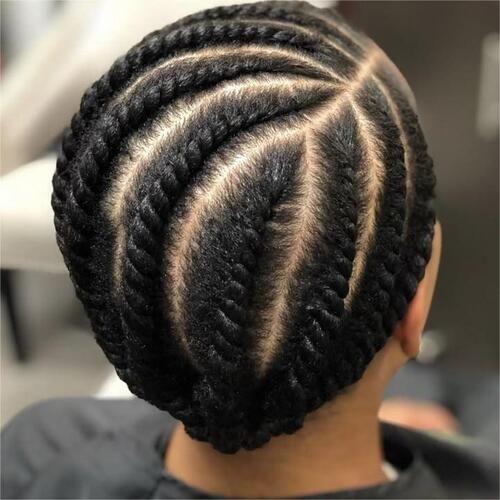
Side Part Sew In Braid Pattern
Source: Pinterest
Designed for side-parted styles, this pattern shifts the parting area to the left or right. It works well with swoop bangs, deep waves, or asymmetrical bobs. It's especially flattering on round or heart-shaped faces.
Related post: Get Gorgeous Deep Side Part Sew In with UNice Hair Bundle
Crochet Sew In Braid Pattern

Source: Pinterest
Though not a traditional sew-in, crochet installs use a similar braid base. The braids are often cornrowed straight back or in a beehive shape, with synthetic or human hair crocheted through. It's low-tension and perfect for curly or afro-textured styles.
How to Choose the Right Sew In Braid Pattern
When deciding on a braid pattern, ask yourself:
❔ Will I leave any hair out?
❔ Do I want the freedom to change parts or wear a ponytail?
❔ Is this a long-term install or something temporary?
If you’re aiming for a flexible look, go for the vixen or versatile side/middle part patterns. Want a full protective style with no maintenance? The beehive or zig-zag might be your best bet. No matter which braid pattern you choose, the quality of the hair makes all the difference. For soft, long-lasting, and easy-to-style bundles, UNice Hair offers a wide range of textures—from silky straight to deep wave—that blend beautifully with natural hair.
Related post: Sew-in Hairstyle Ideas to Inspire Your Next Look
Maintenance and Scalp Care Tips
Protective styles work best when your natural hair stays protected underneath. Here's how to care for your scalp during a sew-in:
✅ Use a light oil or braid spray 2–3 times a week.
✅ Keep your scalp dry—don't overuse heavy oils or creams.
✅ Wrap your hair in a silk or satin scarf nightly to prevent friction.
✅ If possible, wash your sew-in every 2–3 weeks and dry thoroughly.
Final Thoughts
Sew-in braid patterns are more than just a base—they're the foundation for a flawless, protective, and stylish look. With the right braid pattern and good maintenance habits, you can protect your natural hair while rocking everything from sleek middle parts to high ponytails.
So, whether you're installing it yourself or sitting in your favorite stylist's chair, let your braid pattern work with your style, not against it.
