

How to Make a Wig Smaller at Home?
Have you ever received your dream wig only to realize…it’s too big? Don’t stress—it happens more than you think. A loose-fitting wig can look unnatural, feel uncomfortable, and totally kill your vibe. But no worries, babe—we’re here to help! Whether you’re rocking a lace front or a full lace, this guide will show you how to tighten a wig that’s too big, step by step. Plus, UNice offers tons of beginner-friendly wigs designed with smaller heads in mind. Let’s fix that fit!
1. How to Tighten a UNice Wig
Most UNice wigs come equipped with adjustable features to help you customize the fit to your head. These features vary depending on the collection:
Source: unice.com
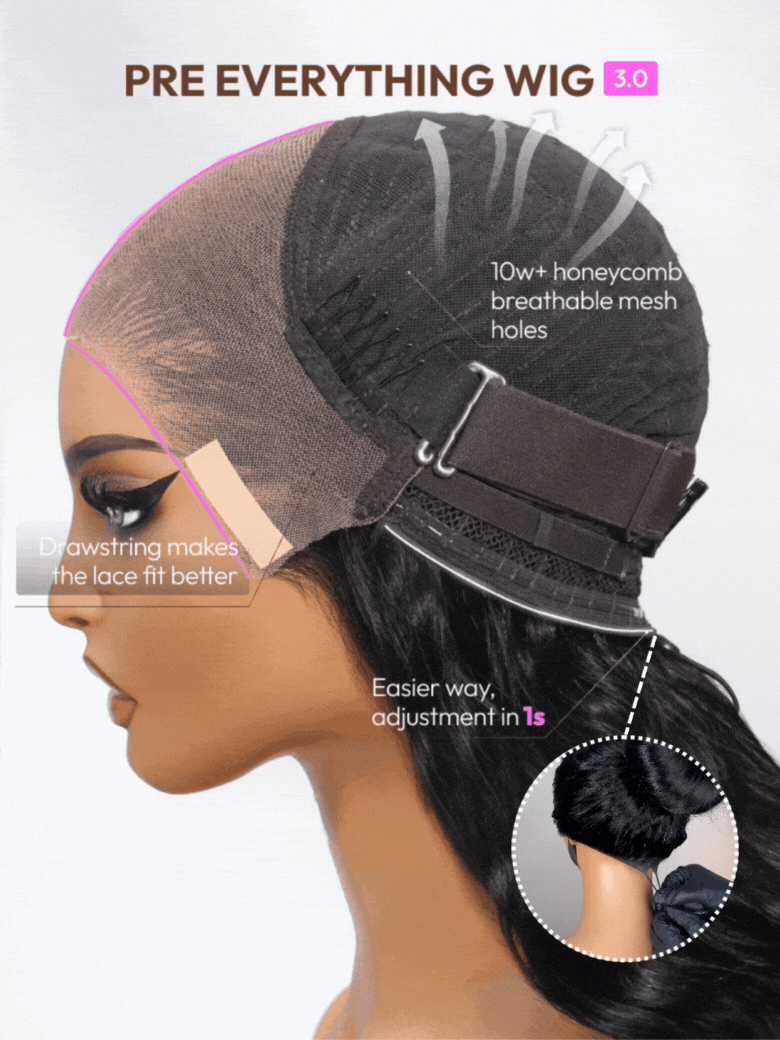
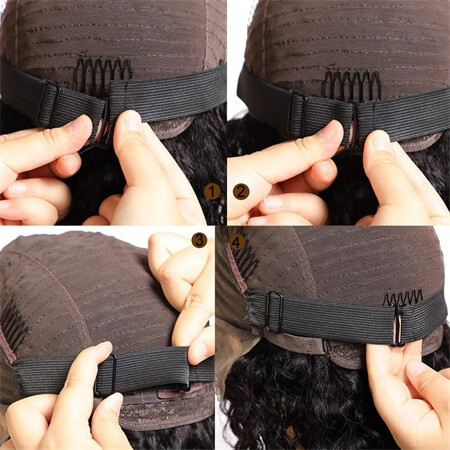
- UNice 13x4 Pre-Everything Wigs 3.0: Use the adjustable hooks at the back of the cap to tighten your wig.
- UNice V Part EasiContour Collection: Features an upgraded elastic drawstring design that makes tightening the wig effortless.
- UNice Bye-Bye Knots Wig 3.0: Includes an adjustable elastic drawstring for a more secure and snug fit.
If your wig doesn’t include built-in adjusters, don’t worry! We’ve got more DIY tricks below.
✨ Shop Wigs for Small Heads
2. How to Tighten a Wig with an Elastic Band
The elastic band method is a go-to fix for a loose wig—especially if you want to avoid glue. It works for both lace front and full lace wigs.
What You’ll Need:
- Wig
- Elastic band
- Scissors
- Needle & black thread
- Measuring tape
Steps:
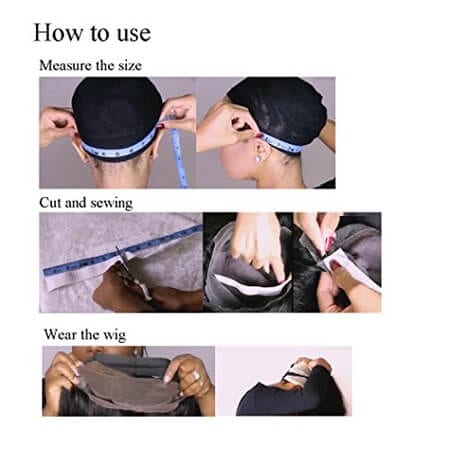
- Measure your head from ear to ear and cut the elastic band to match.
- Place the band inside the wig cap, aligning it with the curve of the cap.
- Sew each end of the elastic band to opposite sides of the wig cap.
- Try on the wig and adjust for a tight, secure fit.
3. How to Make a Wig Smaller with Sewing
If you don’t have an elastic band, you can tighten your wig with a simple needle and thread.
What You’ll Need:
- Wig
- Needle & black thread
- Scissors
Steps:
- Start sewing from behind your left ear across the back of the wig cap to your right ear.
- Repeat the sewing path for extra security.
- Pull the thread gently to tighten, then knot the ends securely.
4. How to Use Wig Tape for a Secure Fit

Wig tape is great for holding a wig in place—especially if you don’t have much hair underneath.
What You’ll Need:
- Wig
- Wig tape
- Q-tip or cotton ball
- Scissors
- Rubbing alcohol
Steps:
- Clean the area where you’ll apply the tape with rubbing alcohol.
- Cut tape strips about 2 inches wide.
- Stick the tape to the inside of the wig where needed.
- Peel the backing and place the wig on your head, pressing to secure.
5. How to Use a Silicone Solution Sheet
A silicone sheet offers invisible hold and is perfect for large wig caps. It adds grip without damaging your scalp.
What You’ll Need:
- Full lace wig
- Silicone solution sheets
- Scissors
- Needle & thread
Steps:
- Cut the silicone into 4 pieces—one for the nape, one for the hairline, and two for behind the ears.
- Sew the pieces into the inside of your wig cap.
- Put on your wig and enjoy the extra grip and comfort!
6. How to Adjust a Wig with Wig Clips
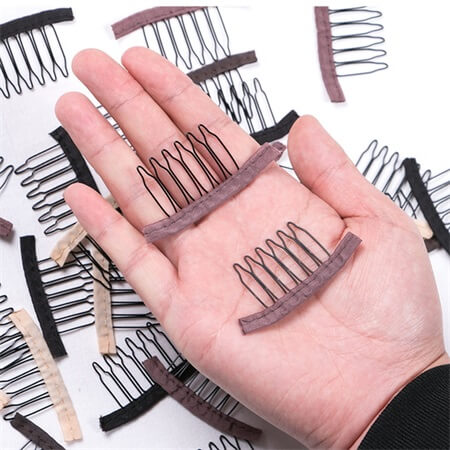
Wig clips can help if your wig is loose and you’re not wearing a wig cap. Just make sure they match your hair color and wig type.
Where to Use:
- Lace front wigs
- Full lace wigs
- 360 lace wigs
Conclusion
A big wig doesn't mean a big problem! From elastic bands to wig tape and built-in adjusters, there are so many ways to make your wig fit snugly. For the easiest experience, shop UNice wigs designed specifically with adjustable caps and small head sizes in mind.

With online shopping becoming the main way of shopping for most people in modern times, people often worry about the size of a wig when they buy it online and have no idea what size they should choose. Are you one of them? In order to help you find the proper wig, now follow our step-by-step guide to learn how to measure your head for a wig.

Have you experienced that when you happily receive your favorite wig but find it is too small for your head? No matter how carefully you put your hair up and how many pins you use, it keeps slipping back as soon as you move your forehead too much. What terrible it is! Here are some methods that can help you make a wig bigger to fit perfectly your head.