How To Sew In with A Lace Frontal Closure?

More and more people are choosing human hair extensions and bundles to create the hairstyles they love while expressing their personal style. But if you're new to sew-ins, you may still have questions about closures and how they work.
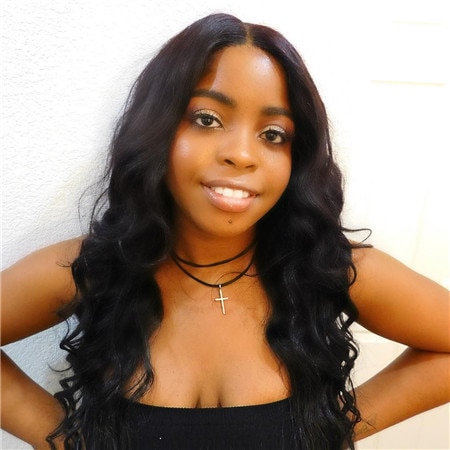
This look is a great example of how a lace frontal closure can add length, volume, and a natural-looking hairline. The model is wearing a Body Wave Frontal Closure from UNice Hair to create a full, polished style. If you're considering a similar look, you can explore the hair closure collection to find an option that matches your desired texture and style.
So, how exactly do you sew in a lace frontal closure?
If you're looking for a simple overview of the process, you've come to the right place. In this guide, we'll walk through the basic methods of installing a lace frontal closure, the steps involved in a sew-in, and how many bundles you may need to complete the look.
There are several ways to install a lace closure or frontal, including bonding, sewing, and using clips. The right method depends on your preferred look, how long you want to wear the style, and whether you want to use adhesive.
One of the most common methods is to sew the back of the lace frontal securely to the braided foundation while using adhesive along the front hairline when needed. The rest of the hair bundles are then installed around the frontal to create a complete style.
Here's what the process can look like:
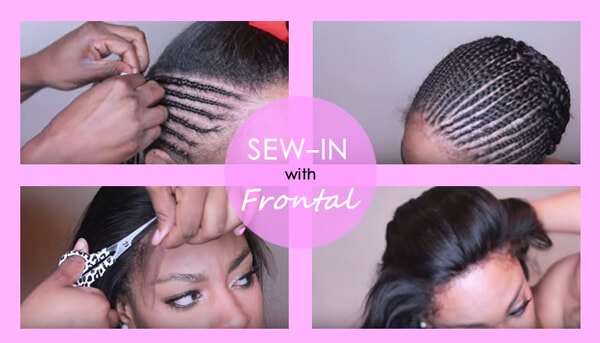
Another option is to fully sew or clip the lace frontal into place. In both cases, the hair bundles are installed around the lace piece to complete the style.
One of the main advantages of a lace frontal is that it can cover the front hairline, creating the appearance of hair growing naturally from the scalp. With a bonded frontal installation, you generally don't need to leave out your natural hair along the front.
If the frontal is fully sewn or clipped into place, some of your natural hairline may be left out, depending on the look you want to achieve and how the unit is positioned.
Now that you know the basics, you may be wondering: What are the actual steps for sewing in a lace frontal closure?
Don't worry. Below, we'll walk you through the basic process and share some practical tips to help you understand how a lace frontal closure sew-in is installed.
Steps: Sewing In Lace Frontal Closure
Step 1: Prepare Your Tools and Hair
Before you begin, prepare an invisible or matching needle and thread. Using thread that closely matches the color of the lace or your hair can help create a cleaner, less noticeable finish.
You'll also want to have your hair properly braided and your frontal ready to position. A flat, secure braid pattern creates a better foundation for the sew-in and helps the lace lay smoothly.
Step 2: Create the Foundation and Position the Frontal
Braid the natural hair in a neat, parallel pattern from the front toward the back of the head. The braids should be secure but not so tight that they cause discomfort or unnecessary tension on the scalp.
Place the lace frontal on the head and carefully position it where you want the hairline to sit. Take your time during this step. Check the placement from the front and both sides to make sure the frontal is even and aligned with your natural hairline.
Once you are happy with the position, use hairpins to hold the frontal in place temporarily. This prevents the lace from shifting while you begin sewing.
Step 3: Sew the Frontal Into Place
Starting near one temple, sew the edge of the frontal to the underlying braid. Continue sewing around the sides and toward the other side of the head, keeping the stitches secure and evenly spaced.
When sewing, guide the needle underneath the braid rather than pulling directly through the lace whenever possible. This helps anchor the frontal to the foundation and allows the lace to lie flatter against the head.
Continue working around the perimeter until the frontal feels secure. Avoid pulling the thread too tightly, as excessive tension can make the style uncomfortable and may place unnecessary stress on the lace or natural hair.
Step 4: Finish the Hairline and Style the Look
Once the frontal has been sewn into place, check the edges and make any final adjustments. If you are using adhesive, apply it carefully according to the product instructions and avoid applying products directly to the natural hairline whenever possible.
After the frontal is secure, install the hair bundles around it to complete the sew-in. You can then style the hair straight, wavy, curly, or in another look that suits your personal style.
You can watch the video below to see an example of how to install a lace closure with hair bundles.
What Are the Benefits of a Sew-In with a Closure?
A sew-in with a closure can give you a secure style while helping create a natural-looking finish. Because the closure covers part of the top of the head, you can enjoy a complete hairstyle without leaving out a large amount of your natural hair.
One of the biggest benefits is styling flexibility. Depending on the hair texture you choose, you can wear the hair straight one day and curly or wavy the next. Human hair bundles can also be styled with heat tools when used carefully and with proper heat protection.
A sew-in can also give your natural hair a break from daily styling and environmental exposure. While the extensions take on much of the daily manipulation, your natural hair remains braided underneath the style.
For people who are not comfortable applying or removing lace adhesives, a sewn-in installation may also be a practical alternative to wearing a fully bonded style.
Another benefit is the secure feel. When properly installed and maintained, a sew-in can stay in place for an extended period while still giving you the freedom to style the hair in different ways.
In this look, the model is wearing a Straight Frontal Closure from UNice Hair to add length and volume while creating a natural-looking finish.
How Many Bundles Do You Need for a Full Sew-In with a Closure?
How many bundles are needed with a closure?
The number of bundles you need depends on the length, desired fullness, and the type of look you want. For shorter lengths, such as 8–14 inches, 2 bundles may be enough for a full sew-in with a closure. For lengths around 16–22 inches, 3 bundles are generally a more popular choice. For longer lengths, you may need 4 bundles to achieve a fuller look.
Keep in mind that longer hair can sometimes look thinner toward the ends, so the length of the bundles is not the only factor to consider. If you want a fuller style, especially with longer lengths, choosing additional bundles may help create the density you want.
How many bundles do you need with a frontal?
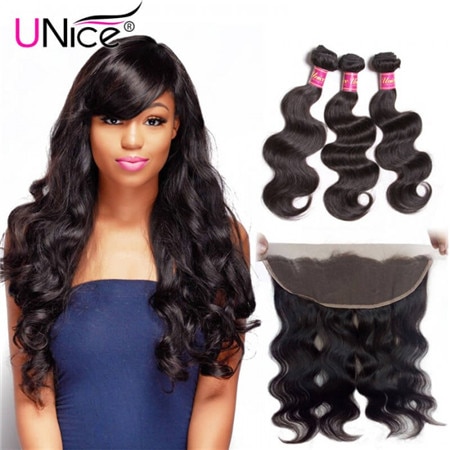
A 13×4 lace frontal covers more of the front hairline than a traditional closure, so the number of bundles you need may vary depending on the length and fullness you want.
For shorter lengths, around 10–16 inches, 2 bundles may be enough for a full look with a lace frontal. For hair longer than 16–18 inches, 3 bundles are often recommended. For example, if your longest bundle is 24 inches, a 20-inch, 22-inch, and 24-inch bundle combination with a frontal can create a balanced look for a full sew-in.
When choosing your bundles, also consider the density and texture of the hair. If you prefer a very full style or are working with longer lengths, you may want to choose more hair to achieve the desired volume.
Lace closures and frontals can create the appearance of hair growing naturally from the scalp. Depending on the design, they can be installed by bonding, sewing, or using clips. The best option depends on your desired look, your styling preferences, and the recommendation of your stylist.
Do you need a closure for a full sew-in? Not necessarily. However, a closure is often used when you want a full sew-in without leaving out your natural hair. It can help create a more complete and natural-looking finish. Closures can also be used to create different parting styles and even certain bang looks.
Whether you choose a closure or a frontal depends on the look you want to achieve. Once you know your preferred length, texture, and level of coverage, choosing the right hair becomes much easier.
Ready to create your next sew-in? Explore UNice Hair's collection of lace closures, frontals, and human hair bundles to find the combination that works for your style.