How To Put On A Wig? A Comprehensive Guide.
Wigs open up endless possibilities for transforming our appearance. From adding length and volume to exploring vibrant colors and textures, they are an interesting and versatile way to express yourself. However, wearing a wig can be intimidating for beginners. Fear not! In today's post, we're going to show you how to put on a wig to make sure you get the perfect comfortable wig experience.
Given that there are various types of wigs, this article consists of two main parts, the first part shows how to wear a lace front wig, and the second part introduces how to put on a glueless wig. If interested, please keep checking.
Source: Pinterest
How to Put On A Lace Front Wig?
Hey there, wig newbie! Let me walk you through exactly how I learned to slay my lace front wig without the stress. Follow these steps and you’ll look like a pro in no time.
Step 1: My Must-Have Wig Toolkit
Trust me – scrambling for supplies mid-process is not cute. Here’s what I always prep:
✔️ Lace front wig
✔️ Wig cap (nude matches most skin tones!)
✔️ Sharp scissors (tiny ones work best)
✔️ Wig glue or tape (I prefer glue for longevity)
✔️ Foundation/concealer + makeup sponge
✔️ Hair clips + wide-tooth comb
✨ Bonus: Edge control gel for baby hairs!
Step 2: Prepping My Real Hair
This step is KEY! I start by washing my hair with a clarifying shampoo to remove any oils, ensuring the wig adhesive bonds securely. Next, I either braid my hair into cornrows or slick it flat using mousse for a smooth base. Finally, I tuck everything neatly under a wig cap—no stray hairs allowed!
Step 3: Customizing the Lace
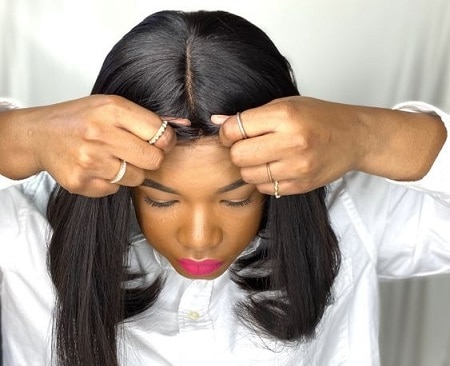
Here’s where I almost panicked my first time. Place the wig on your head (don’t glue yet!), align the hairline, then gently trim excess lace with scissors, leaving ¼ inch to secure it later. For a realistic touch, I pluck a few hairs near the front—subtle but game-changing!
Step 4: Adhesive 101 – Less is More!
I use a thin layer of wig glue along my hairline and wait until it gets tacky (about 1-2 minutes). Game-changer: Work in sections instead of doing your whole head at once.
Step 5: The Big Moment – Wig Placement
Deep breath! Starting at the front, I press the lace into the glue, matching my hairline exactly. I smooth it down gently with a comb—no bubbles allowed!
✨Pro tip: Keep a handheld mirror nearby to check alignment.
Step 6: Secure Everything
Secure the sides/back with wig clips or pins. Adjust the inner straps until it feels snug but not tight. If you’re extra active, add a dab of glue to the edges.
Step 7: Blend the Lace
If the lace still looks obvious, I dab foundation/concealer on it with a sponge and blend along the hairline. Now it looks like my scalp!
Step 8: Style That Masterpiece
Finally, I comb the wig, spray with light hold hairspray, or use gel to lay down baby hairs. The best part? It’s my look—natural, bold, or anything in between!
Lace Front Pre-Everything Wig For You
How to Put On A Glueless Wig?
Glueless wigs are a great option for those who want to avoid the hassle and burden of using adhesives. UNice Hair carries a wide selection of glueless wigs, such as pre-everything wigs, put-on-and-go wigs, v-part wigs, u-part wigs, and more, to suit everyone's needs. Below are detailed instructions on how to wear gel-free wig
1. Prep My Hair Like a Pro
I start by braiding my natural hair tightly against my scalp or sliding on a breathable wig cap. This step isn’t optional—it’s the secret to a smooth, lump-free base. If the hair pokes out, the wig might look uneven, so I double-check with a mirror!
2. Position the Wig Perfectly
Holding the wig’s front edges, I lower it onto my head like a headband, matching its hairline exactly with mine. At first, it might feel loose or awkward, but I don’t panic—adjustments come next!
3. Secure It Snugly
Most glueless wigs have adjustable straps inside. I tighten these gently until the fit feels snug but not suffocating. If there are combs or clips sewn into the cap, I press them into my braids or wig cap.
4. Style It Like It’s My Own
Once it’s secure, I style freely! I might part the hair slightly off-center for a natural look, fluff the roots with my fingers for volume, or use a low-heat iron if the wig fibers allow. Remember: A little messiness hides any “too perfect” wig vibes!
Hot-Selling Glueless Wigs At UNice Hair
FAQs about How to Put on a Wig
Do I Need to Use Glue to Wear a Lace Front Wig?
Not necessarily! Wig glue gives a stronger hold, but tape works too. If you'd rather skip adhesives altogether, a glueless wig with adjustable straps and built-in combs is a great alternative — no mess, no stress!
What Type of Wig Cap Should I Use under My Wig?
I always go for a nude-colored wig cap — it blends with most skin tones and creates a smooth, lump-free base. Just make sure every strand of your natural hair is tucked in neatly before putting it on!
How Do I Apply Wig Glue Correctly?
Less is more! Apply a thin layer along your hairline, wait 1–2 minutes until it gets tacky, then press the lace down. Work in sections for better control — trust me, it makes a huge difference!
Can Beginners Wear Lace Front Wigs?
Absolutely! It might feel intimidating at first, but once you break it down step by step — prepping your hair, trimming the lace, applying glue in sections, and blending with concealer — it's totally manageable. A little practice and you'll be slaying it in no time!
How Can I Style My Glueless Wig to Look More Natural?
Try parting the hair slightly off-center, fluffing the roots with your fingers, or using a low-heat iron if the fibers allow. My secret? A little messiness actually makes it look more natural!
Conclusion
In short, getting to grips with the art of wearing a wig will allow you to open up a world of styling possibilities. By following the steps outlined in this guide, you can achieve a natural, comfortable, and confident look. Enjoy expressing yourself through different hairstyles by embracing the versatility and creativity that wigs offer.