
How to Do a Quick Weave - Step-by-Step Guide
A quick weave offers a fast and stylish way to transform your look. This technique involves gluing hair wefts onto a protective cap placed on your head. Mastering how to do a quick weave can save you time and money while giving you the freedom to experiment with different hairstyles.
What is a Quick Weave?
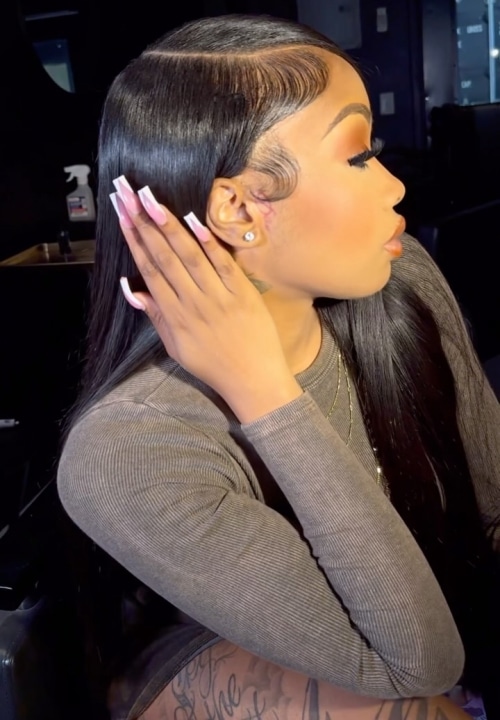
Source: @leorasqueendome
A quick weave is a popular hair technique that allows you to change your hairstyle quickly and easily. You can apply hair wefts directly onto a protective cap placed on your head. This method offers a fast way to achieve a new look without the long-term commitment of traditional sew-ins. You can enjoy the flexibility of trying different styles without causing harm to your natural hair.
Benefits of Using a Quick Weave

Source: @sylaniaa
Quick weaves come with several benefits that make them a favorite choice for black women. Here are some reasons why you might consider using a quick weave:
Time-Saving: You can achieve a complete hairstyle transformation in a fraction of the time it takes for other methods.
Versatility: With quick weaves, you have the freedom to experiment with various quick-weave hairstyles and colors.
Protection: The protective cap ensures that your natural hair remains safe from glue and styling products. This makes it ideal for those with delicate or thinning natural hair.
Cost-Effective: Quick weaves are generally more affordable than sew-in weaves, making them accessible for those on a budget.
Essential Tools and Products for Quick Weave
· Hair weave
First, you need to choose the right hair weave. They come in various textures, lengths, and colors. Pick extensions that match your desired style. For a full and natural look, use 3 to 4 bundles. If you want longer or more voluminous hair, consider using 4 to 5 bundles.
· Protective cap
A protective cap is crucial. It acts as a barrier between your natural hair and the bonding glue. This cap keeps your hair safe from potential damage. Make sure it fits snugly on your head for the best protection.
· Bonding glue
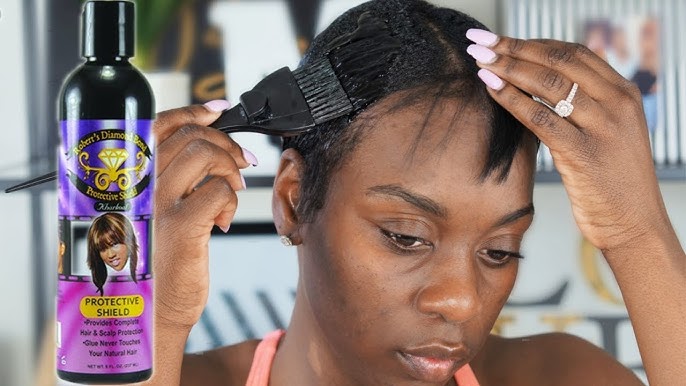
You'll need bonding glue to attach the hair extensions to the protective cap. Choose a high-quality glue to ensure a secure hold. Other tools include scissors for cutting the extensions and a comb for styling. These tools will help you achieve a neat and polished look.
How to Do a Quick Weave?
Preparing Your Hair
Before you start, it's crucial to prepare your natural hair properly. This ensures a smooth application and protects your hair.
Washing and Conditioning
Begin by washing your hair thoroughly. Use a gentle shampoo to cleanse your scalp and hair. Follow up with a conditioner to keep your hair moisturized. This step helps remove any dirt or product buildup, providing a clean base for your quick weave.
Braiding and Securing Natural Hair
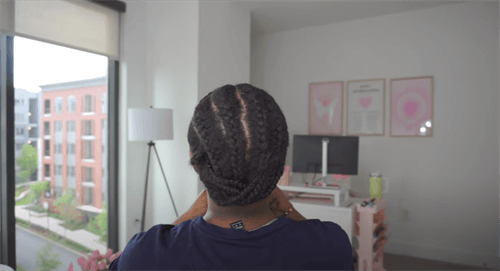
Source: @DionaLatia
Once your hair is clean and dry, braid it into cornrows. This step keeps your natural hair flat and secure under the protective cap. If you're not comfortable with braiding, you can use molding gel to slick your hair back. Make sure your hair is completely dry before moving on to the next step.
Placing the Protective Cap
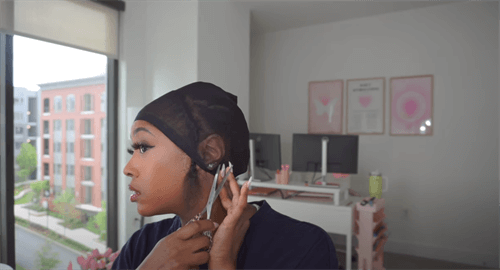
Source: @DionaLatia
Put on the protective cap over your braided hair. Ensure it fits snugly and covers all your natural hair. The cap acts as a barrier, protecting your hair from the bonding glue. Adjust it as needed to make sure it's comfortable and secure.
Bonding the Hair Weaves
Source: @DionaLatia
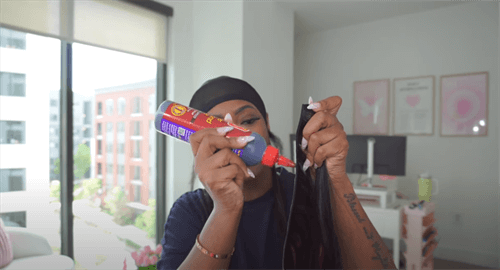
With the cap in place, start applying the hair extensions. Use bonding glue to attach the wefts to the cap. Begin at the nape of your neck and work your way up. Press each weft firmly to ensure it sticks well. Continue this process until you've covered the entire cap with extensions.
Styling and Finishing
After applying the extensions, it's time to style and finish your quick weave. This step allows you to personalize your look.
Cutting and Shaping the Weave
Source: @DionaLatia
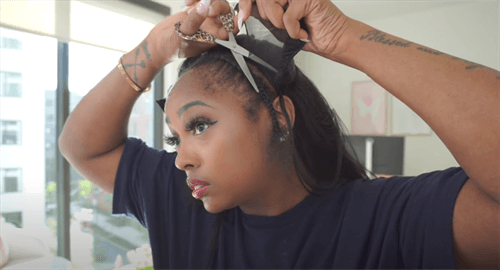
Use scissors to trim the extensions to your desired length. You can also shape the weave to frame your face. Take your time with this step to achieve a natural and flattering look.
Final Touches and Styling Tips
Source: @DionaLatia
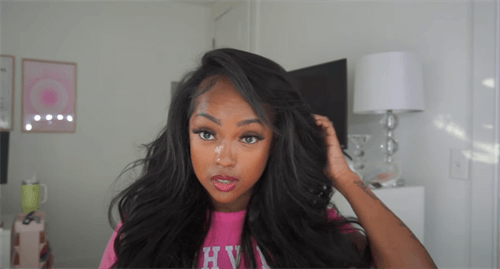
Finally, style your flip-over quick weave as you like. Use a flat iron or curling wand to add curls or waves. For a sleek look, straighten the extensions. Add some hair spray or serum for shine and hold. Remember, practice makes perfect, so don't hesitate to experiment with different styles.
By following these steps, you can master how to do a quick weave and enjoy a fabulous new hairstyle. Whether you're a beginner or have some experience, this guide will help you achieve a professional-looking result.
Frequently Asked Questions about Quick Weave
How long does a quick weave last?
A quick weave typically lasts between 2 to 4 weeks. The duration depends on how well you maintain it and the quality of the products you use. Regular care and attention can help extend its lifespan. Remember, quick weaves offer a temporary solution for adding length and volume to your hair. They are perfect for those who want a change without a long-term commitment.
Can I wash my quick weave?
Yes, you can wash your quick weave, but you need to be gentle. Use a mild shampoo and avoid scrubbing too hard. Focus on the scalp and let the water run through the weave. After washing, pat it dry with a towel and let it air dry. Avoid using heat tools immediately after washing to prevent damage. Keeping your weave clean helps maintain its appearance and prolongs its life.
Is a quick weave better than a sew-in?
Quick weaves work well for shorter hair, and it takes less time to finish. You can check our detailed guide to quick weave vs sew-in.
Are quick weaves damaging to natural hair?
Installing a quick weave requires using bonding glue, the glue may dry out your natural hair if used incorrectly.


