Havana Twists for Beginners: What You Need to Know
If you’re looking for a hairstyle that combines boldness, low maintenance, and Instagram appeal, Havana twists could become your new favorite. Ideal for safeguarding natural hair while offering countless styling possibilities, these twists are popular among everyone from busy moms to fashion-forward individuals. Let’s explore everything you need to know!
What Are Havana Twists?
Source: Pinterest
Havana twists are a stylish protective hairstyle that involves twisting synthetic or human hair extensions around your natural hair. Rooted in Afro-Caribbean traditions, these twists are thicker and more textured than standard Senegalese or Marley twists, providing a soft, voluminous look. Ideal for those seeking dramatic flair without the daily styling effort!
How Long Do Havana Twists Last?

Source: Pinterest
Havana twists can last 4–6 weeks with proper care. To keep freshness, moisturize your scalp, wrap your hair at night (satin scarves are essential), and avoid excessive tension. Pro tip: Don’t skip wash day—use diluted shampoo and gentle drying to keep twists bouncy.
How Much Are Havana Twists?

Source: Pinterest
Prices vary based on length, stylist expertise, and location. On average, expect to invest $150–$400. DIY kits cost $30–$100 for hair extensions and tools, but beginners might prefer a pro for that flawless look. Remember: Quality extensions and installation are worth the splurge!
How To Do Havana Twists: A Quick Guide
✅Prep Your Natural Hair
Start with clean, moisturized hair, applying leave-in conditioner. My scalp tends to dry out, so I focus on moisturizing my roots before installing.
✅Section Your Hair
Use the rat-tail comb to part small, neat sections (1–2 inches wide). Clip away unused hair. Smaller sections = more twists and a fuller look, but they take longer. I once rushed sectioning and ended up with uneven twists—patience is key!
✅Attach Extensions
Cut Kanekalon hair into 2–3 strands per twist (length varies; I opt for 18–24 inches). Fold one strand in half, loop it around the base of a section, and pull through to secure (folded method).
⚡Tip: If your hair is slippery, dampen it with water or gel for better grip.
✅Two-Strand Twist
Split the extension into two equal parts. Twist them around each other tightly, working down to the ends. Keep tension consistent to avoid lumps. I usually twist away from my face for a uniform look.
✅Secure the Ends
Dip the ends in boiling water for 3–5 seconds to seal (use gloves!) or wrap with a small rubber band. I burned my finger once—now I use a kettle with a precision pour spout.
✅Repeat & Adjust
Work methodically from the nape upward. Check symmetry in a mirror. I leave the front sections slightly smaller for a face-framing effect.
6 Chic & Popular Havana Twists to Try
Jumbo Havana Twists

Source: Pinterest
Big, bold, and low-maintenance! Jumbo twists make a statement with their chunky texture. Ideal for busy bees, this style slashes installation time.
Havana Twist Bun
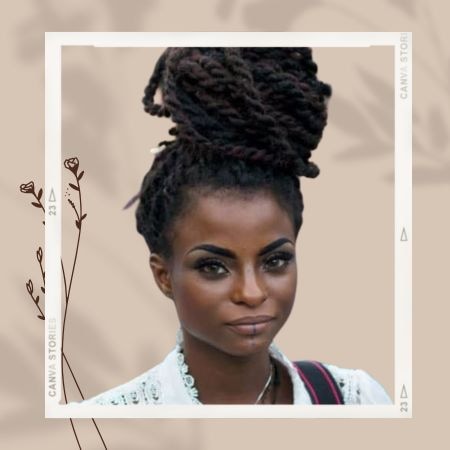
Source: Pinterest
Elevate your updo game! Gather twists into a high or low bun for a sleek, elegant vibe. Bonus: It’s gym-friendly and protects your ends—win-win!
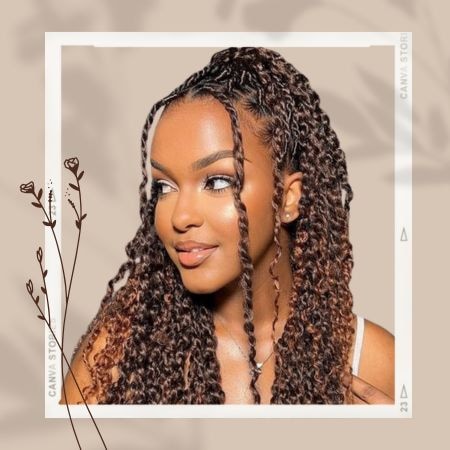
Medium Havana Twists

Source: Pinterest
Medium twists strike the perfect balance between volume and versatility. Dress them up with beads or keep them simple for everyday glam.
Short Havana Twists

Source: Pinterest
Edgy and playful, short twists frame the face beautifully. Great for oval or heart-shaped faces, this shoulder-grazing style adds texture without overwhelming petite frames.
Small Havana Twists
Source: Pinterest
Delicate and intricate, small twists offer a subtle, polished look. Though time-consuming, the detailed pattern is a showstopper.
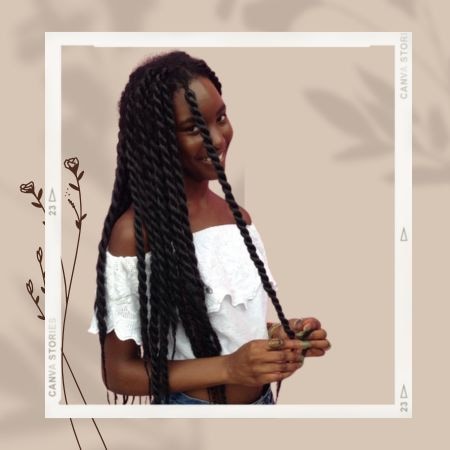
Long Havana Twists
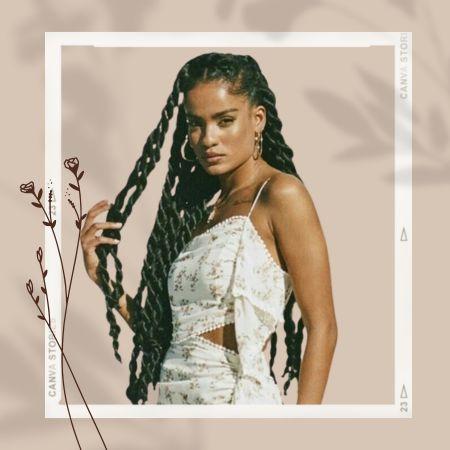
Source: Pinterest
Go big or go home! Long-length twists ooze drama and movement. Perfect for festivals or date nights, but invest in quality extensions to avoid heaviness.
Conclusion
Havana twists are a stylish and versatile look for any personality or occasion. Whether you prefer jumbo or short, there’s a twist for everyone. Ready to flaunt your next twist?
Related Articles
Spring Twists: The Ultimate Guide To Gorgeous Natural Hair
Three Strand Twist: Your Ultimate Guide to Effortless Style
Senegalese Twist Guide for Beginners: Everything You Need to Know