How To Create Money Piece Highlight At Home?
You might notice a comeback of money piece highlights or face-framing highlights around this summertime. If you have little idea about this color trend and plan to try this technique, you can check out our previous post: What Is a Money Piece Hair?
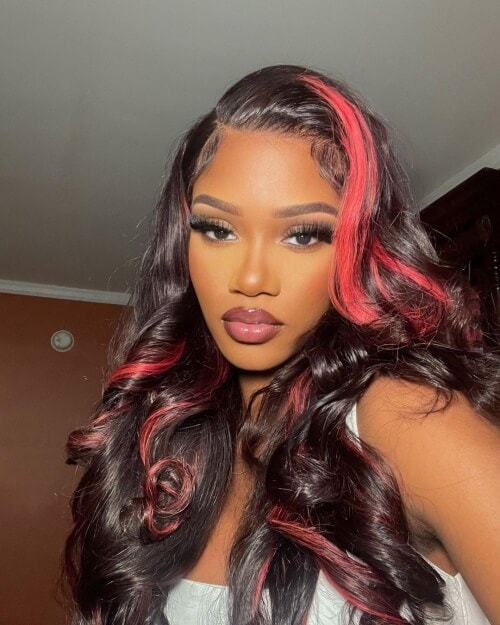
The money piece highlight is perfect for someone who hesitates to do an entire coloring look but wants to try a subtle color placement and switch-up. The money piece allows you to add a shade of different color to your hair, and the color can be the same tone as your hair or a completely different color clash.
Why Should You Get A Money Piece Highlight At Home?
Changing the color of your hair often means that you should also alter your whole routine of maintenance. The whole thing is a lot of work because it needs time to do research and sometimes pays the hairdresser for advice. Don't mention that you probably need to head out to the salon, and not everyone enjoys spending hours on salon chairs when the world is still in the pandemic.
So the money piece highlight is here showing its charm. The color technique is not a new or complex technology. It usually needs just two sections of your front hairline, which involves less work and mess. Some of you may have deja vu that you messed up your hair and house, but the money piece doesn't ask you to be skillful. In a word, it's a beginner-friendly style.
Tips You Should Know Before You DIY Highlights At Home
1. Think Thoroughly
Before you dive into this tutorial, you need to figure out what Looks you are going for. You can play the safe card by painting several strands and using the same tone to achieve a natural and simple look. Or you can use a color clash on your hair if you fantasize about a bolder and more creative style.
2. Ask For Advice
The hair color kit from a local drug store or online seller might give you an unwanted surprise by showing a completely different color on your hair. This can be due to wrong placement, poorly matched coloring, etc. The best way to avoid this situation is to talk with a pro or someone who at least successfully did her/his own hair.
3. Pay More Attention To Bleaching
If you are going for something lighter, bleaching before highlights can bring good results. But your hair will be put at risk of burning, breakage, and discoloration. So you need to make sure of the exact process time, the ratio of bleach power and developer, your base hair color, etc.
4. Consider A Strand Test
You can get a strand of your hair to be processed before highlighting a larger selection. See the result of the strands, then make a decision.
How To Highlight Hair At Home?
Things You Might Need For The Process
- Bleach
- Developer
- Mixing Bowl
- Rat-tail Comb
- Gloves
- Towel
- Hair Clip
- Foil
- Brush
- Blow-dryer
1. Mix The Lightener And Developer
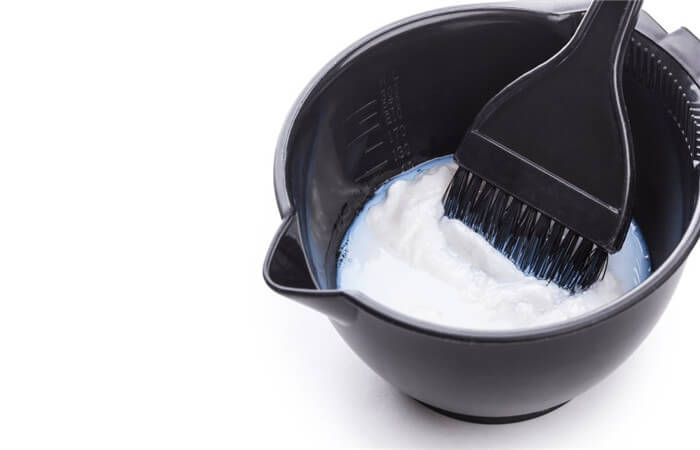
Mix them up at one to two mixing ratios for a natural layer effect, or you can use more developers if you want your hair to be brighter. But we suggest you use 10-20 volumes to lighten your hair, a higher volume is for darker hair color (black hair, dark brown hair) and can cause your hair irreversible damage if you mistakenly use it.
Make sure to blend your lightener and developer into a fairly running cream so that you can apply it to your hair and will not drip from your hair to the ground or your clothes.
2. Section Your Hair For Highlights
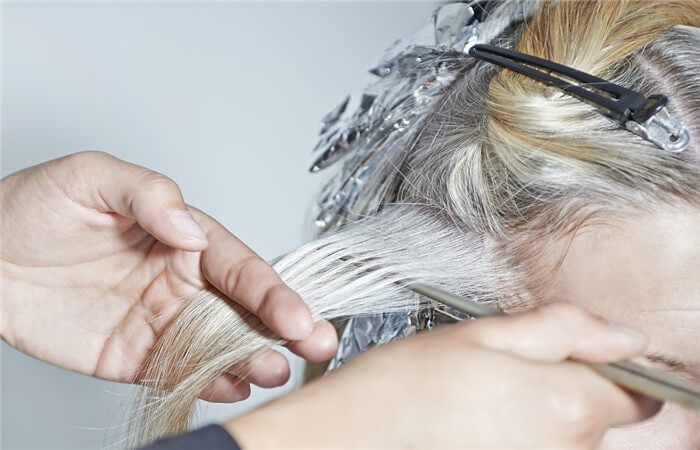
Money-piece hair just needs a little section of your hair. So part your hair and tie the hair up with a hairband or clip. Separate the sections with the comb and make sure the hair is thin, not just grab randomly and go for bleaching. Take a slice of your front hairline out, then organize the rest of your front hair on top with clips. You need to repeat the steps for creating layers and a natural look.
3. Highlight Hair With Foils
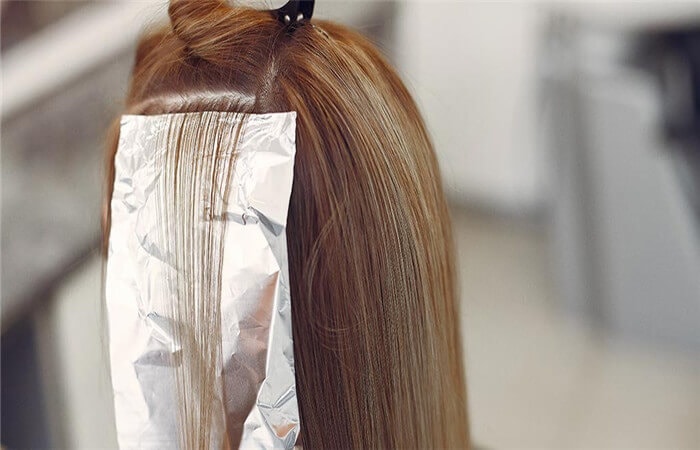
Put the foil under the part you are trying to bleach and apply the products from the middle to the end. Apply the bleach onto your strands, you can go all the way to your root if you want a full coloring. Or you can just paint the sections which you want to be different if you want to achieve a balayage effect. You can blend the products diagonally to make a more natural look when you reach the root where natural hair starts growing out.
4. Check The Result
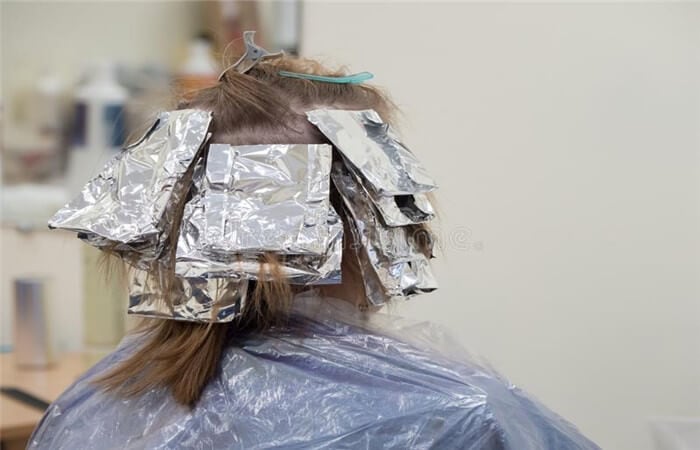
Use foil to wrap the bleached part to keep the hair fully saturated for a better result. Check the hair every 10-15 minutes until it reaches your expectations. Shampoo and condition the hair after the processing. And according to experts, it's done when the bleached hair looks yellow or pale yellow, not red or orange.
5. Give Your Hair A Deep Conditioning
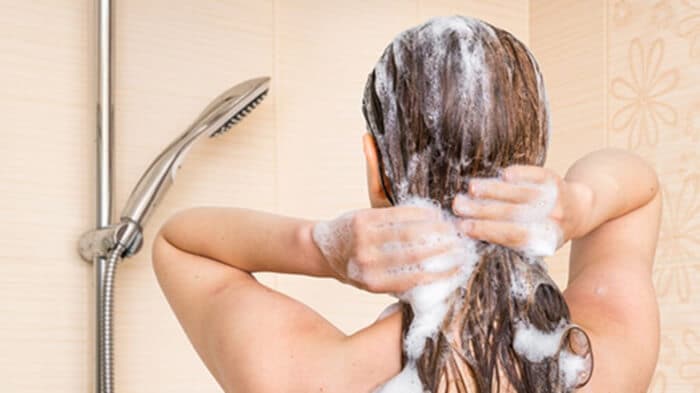
Your hair will be vulnerable after all that highlight processing. You can shampoo and conditioner to give your processed hair back to life by keeping it moist and cleaning out the chemicals of the hair strands.
6. Blow-Dry Your Hair
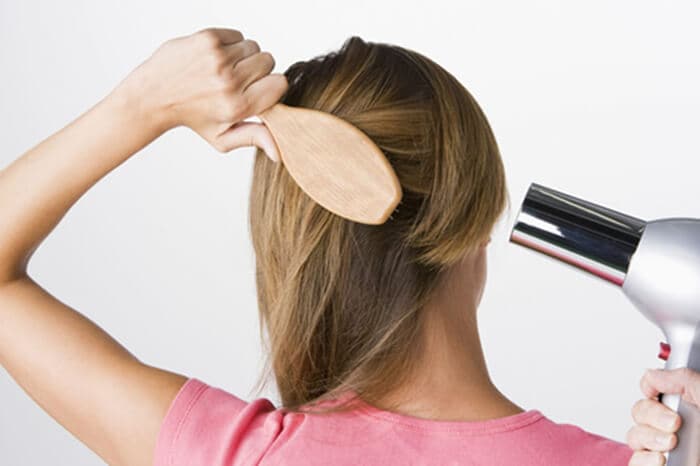
The final step is to see the result. Comb your hair after hair is 90 percent dry for detangling and smoothing the hair. And you will see the result.
How To Highlight Your Human Hair Wigs?
As we all know real human hair wigs can be dyed and styled with heat, so you can get a money-piece wig if you want to experience something new. And here is a full video on how to highlight your human hair wigs on a wig head at home.
Some Popular And Hot-Selling Money Piece Highlight Wigs
If you think it is a bit difficult to dye money piece highlights at home, then you can choose some money piece highlight wigs.