


How to Make Box Braids by Yourself?
As winter approaches, it's time for curly girls to start taking care of their hair, and the easiest, and least expensive, way to protect it is with protective hairstyles. Protective hairstyles are definitely not new to curly girls.
As the temperature drops, the cold weather and wind can take a toll on our fragile strands, so it's important to keep your hair moisturized. If you're looking for a hairstyle that protects your hair and is stylish at the same time, then you can opt for a box braid. We will show you how to do box braids step by step in this blog.
What is a box braid?

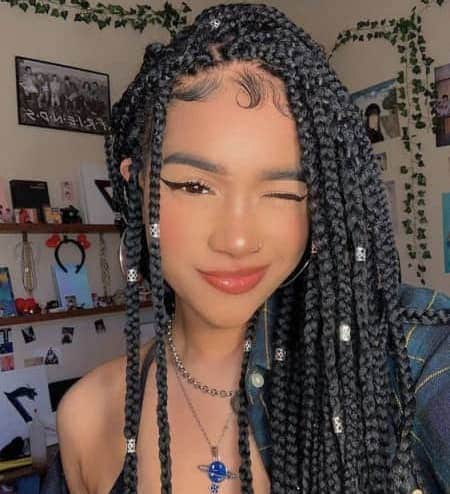
Box braids are braids or three-strand braids that have been braided into a square shape. Unlike cornrows, box braids are not braided flat on the scalp, but rather the hair is divided into squares (or boxes) and braided down over the entire scalp. You can do this with your own hair, or you can add length and thickness with hair extensions, or add color.
Box braids are traditional African braids, and in 2020, celebrities and influencers are bringing back this iconic 90s black style.
Knotless braids are a modern adaptation of the classic box braid that is more natural, looks more like your own hair and puts less stress on your hair, so if you have a more sensitive scalp, knotless braids are a better choice.
Both are great protective styles that don't use hot tools, have no constant pulling, and won't affect your hair growth. However, if box braids are not installed properly, or left in place for too long, they can cause damage to your hair.
How do I prepare my hair for box braids?
There are a few things you should do to prepare for the installation of box braids. First, and most importantly, wash, comb, deep condition and trim your hair before braiding, which is a prerequisite for healthy and nourished hair.
Box braids typically last up to two months, during which time it can be difficult to wash your hair or clean dirt and buildup from your scalp, so it's essential to start with clean hair.
Box braids are not cheap, as they can take up to eight hours to do. If you have the budget, you can spend $100-$400 for your box braids. However, if you don't have that much budget yet but still want to try this style, the tutorial below will show you how to achieve this style at home.
How to make box braids?
Step 1.Wash hair
Wash, deep condition, comb, and blow dry your hair. Be sure to have a clean, moisturized base at first to ensure this style will hold up.
Step 2. Use leave-in product
After washing your hair clean, use your favorite leave-in product to make sure your hair is as smooth, hydrated and easy to work with as possible. Use a heat protectant to protect your hair from the heat before blow-drying your hair and finally blow-drying your hair before continuing with the braid.
Step 3. Divide your hair into sections
Divide your hair into sections for braiding, and then divide it into smaller sections within those sections. The smaller sections will be the size of your braids, so make them miniature or jumbo, depending on your needs.
Make sure you use a good precision comb so that you can comb out the clean sections. You can use a hairband to separate the hair you don't braid, so it's out of the way and better to work with.
Step 4. Weaving your hair
Now start weaving your hair. First, take a piece of braided hair and place it on top of the piece that is separated. Start braiding a three-strand braid. The three strands are the braided hair; your own hair; the braided hair.
Step 5. Put real hair in the braid
When you have just a little bit of real hair left, you can put it in the braid. To make your braid shiny and strong, use a gel to add control without weighing it down. Keep combing your hair as you braid; the smoother your hair is, the longer your braid will be.
Step 6. Braided hair
Now that you have only two sections of hair in your three-strand braid, take one of the two sections and divide it into three more sections, continue to use edge control and gel to set the hair and continue braiding all the way through.
Step 7. Seal the ends
Once all the braids are done, seal the ends of the braids with hot water. To make your braid last and keep the flyaway hair flat, we recommend using a few pumps of Foam Mouse.
Step 8. Use edge control
Use edge control and an edge brush or toothbrush to lay down your baby hair. The key to a sophisticated look is to lay down your baby hair perfectly and now your look is complete.
Your braids are installed, but what you have to do is not over yet. Maintaining your braid is very important and you want to keep it frizz-free for as long as possible. You can use a satin cap, scarf, or silk pillowcase to protect your hair while you sleep.
We also suggest you get an anti-itch spray so you don't ruin your look by scratching your hair with your hands when your scalp gets itchy. Since you won't be able to use shampoo for a few weeks, we also recommend using a scalp cleansing rinse when you install your braids, which will keep your box braids in place longer.
Box braids hold longer is what many people want, but it can also cause hair breakage, and loss of shine, and leave your scalp with a lot of dirt buildup. If you want to extend the length of your box braids, we recommend redoing the hairline and nape of your neck in about six weeks.
How do I remove my box braids at home?
If you want to remove your box braids at home, make sure you don't rush and do it in a hurry. You'll want to pick a weekend or a time when you have more time to do this so you don't damage your hair. Follow us step by step to undo your box braids below.
Step 1
Spray your hair with warm water. Follow with a hair loss product to add some slip to your hair. We recommend you do this in sections to keep your hair moist or it will dry out as you work.
Step 2
Start at the bottom and slowly work your way up. If you add extensions, you can speed up the process by cutting the hair at the bottom, you want to leave enough room for your natural ends. And your hair may already be long, so don't cut off too much so you don't cut your own hair.
Step 3
Apply some detangler to your fingertips and slowly detangle the braid from the bottom up. Use a wide-tooth comb or your fingers to continue untangling your hair.
Step 4
Once you have completely detangled the braid down to the roots, you can remove the extensions. After removing your protective hair extensions, you'll want to give your hair some TLC. Let your hair a have a deep clean and conditioned and replenished with enough moisture.
Related articles
If you want to know more about hair care, such as how to wash your scalp properly or how to exfoliate your scalp, you can check out these two articles from us at:
Submit Your comment